Showing posts with label Nn3. Show all posts

Thursday, February 27, 2020

Man Down

Last annual checkup the doc let me know that I was herniated. Yay me. So a week ago last Monday I went and had it fixed. For the last week and a half I've been recovering from that, and let me tell you it's no fun. I was convinced for the first couple of days at least that it would have been less painful to keep the hernia. It's getting better now, but it is going to be a few more days yet before I'm ready to go back to work.

So what have I been doing in the meantime you may ask?


First, I finished the second of my Nn3 T-TRAK modules. The trackwork had been finished and bulletproofed and the dock itself was built, what it needed was scenery. I had gotten the basic mountain done and I had built the shack, but it needed trees and finish work. The outhouse, trees, shrubbery, talus and people were all installed and then the module was cleaned and finished. I think it turned out really good.


The railings and dock workers were the finishing touches that the module really needed. Now I have two corners and a pair of singles with the Nn3 curving off to the back that will finish the narrow gauge loop to complete and then perhaps the whole collection can be taken to a show or two.


I also got some building done on my narrow gauge rail cars. I had purchased a bunch of them in anticipation of the closing of Republic Locomotive Works; Marshall (the owner) had expressed an intent to retire at the end of 2019 but apparently everyone else decided it was time to put in an order at the same time I did. He ended up having a great year and decided to hang around for a while. That is a good thing, but that meant I had a bunch of rail cars to build before I can put in another order (the East Broad Top had a lot of hoppers).


 The above picture is the fruit of my labors in that respect. Along with my regular order I got a bunch of stuff that I didn't order, mostly defective castings that I suspect came from the scrap bin at RLW that Marshall was throwing in with the orders to clean out his bins and also to give his customers some scratchbuilding materials. So along with the boxcars, hoppers, flat car and caboose that I did order I got a couple of boxcars that I didn't order that just needed some holes filled and truck bolsters rebuilt, and I also got a tank that I decided to put on a flat car.

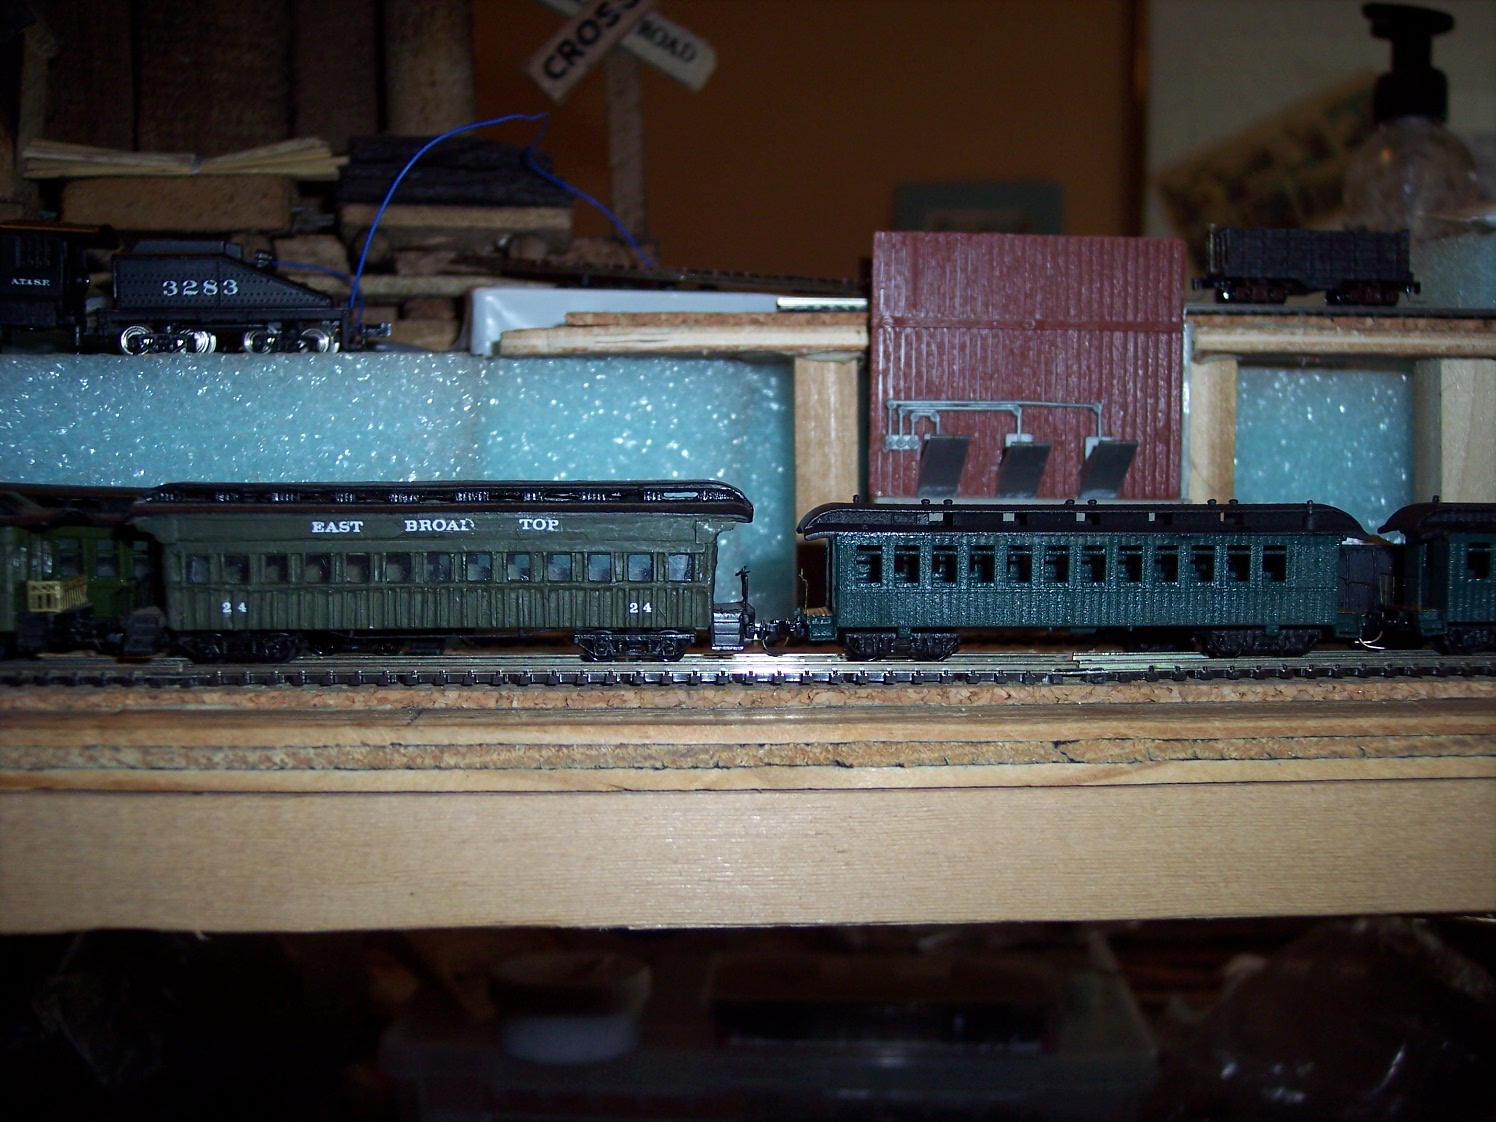
The East Broad Top did have such a tank car, built out of flat car 116. As has become standard for my building style this is not an exact copy of that prototype, but it captures the flavor of the original. Since this photo was taken the tank has been painted silver and the car has been decaled so it looks a lot better in my opinion. It is a welcome addition to my fleet. The flat cars aren't prototype for the EBT either, but...yeah, close enough.

Then I decaled the whole lot, starting with the caboose. I already had 28 so I turned this one to 27. I finished the flat car and the tank car, then I did three of the five boxcars before finally calling it a day. I finished the other two box cars the next day, and now I can concentrate on the hoppers.


My medical vacation will be finishing up soon, I hope, but before I have to go back to work I'm hoping to finish up the coal hoppers I have in the build and then decal some of the ones I already have built for the rock trade. There are ten of those, some are fully decaled, some are partially decaled, and some are not decaled at all. The decals available from RLW do not have the labels for the rock cars, but fortunately the Friends of the East Broad Top sell some in the company store that do. I just got in a few decal sets from the FEBT, so I'll be able to finish up the ROCK decals now.

As for coal hoppers, I have six on the work table right now. The RLW hopper kits consist of a top cast in resin and a bottom frame with attached dumps in white metal. Of the six, three have had their resin tops sanded and fitted to the white metal bottoms with end platforms built and three more sanded and fitted to the bottoms with the end platforms left to build. I also have three more that are still in their package and three more on the way. I should have enough trucks and couplers for the first six but since I have more boxcars than I had planned it's probably about time to take inventory and order some more trucks and couplers. I also need to buy some brake cylinders to fit to the end platforms, something that I overlooked when I put in my initial order.

That should keep me busy until I get back to work.

Saturday, September 21, 2019

Up And Running

I think I have the trackwork all squared away on my T-TRAK modules.

I built a standard T-TRAK end cap (180 degree curve) so that I could make a complete oval with both standard and narrow gauge tracks. I hooked everything together...or I tried to at least. I ran into troubles right away.

First I had trouble connecting the narrow gauge track. Aligning two tracks on standard T-TRAK modules is not so bad, get a double crossing track or a piece of double track with 33mm spacing and check it on each end, easy peasy. However, when you add a narrow gauge track at a higher elevation and setback you really have to pay attention to details because everything has to align in all three dimensions. If not, connecting the modules is troublesome when it's not downright impossible. And of course this was the case, I had some modules that would connect straight away with each other in one configuration but went from difficult to impossible with others or in a different configuration.

So, I had to spend some quality time with the template and shims to get everything at the exact height and depth. I had several end pieces that had the narrow gauge track either higher or lower than the others so they had to be carefully aligned, in some instances the end had to be shaved away to lower the track and in other cases it had to be shimmed higher. I also had to adjust a few tracks end to end to make sure the 2mm spacing between modules was consistent through the depth of the modules in every configuration.

I finally got everything straight, and I checked each module by connecting it at each end with every other module. Every module will connect in various configurations (really there are only about twelve possible connections since two of the modules have curved narrow gauge track and straight standard gauge and will only connect to each other in one specific combination) so it should all be good now. And then I ran trains...or attempted to...and found other issues to deal with.

First I had power delivery issues. I have connected the Tamiya connectors, which is what both Kato and Rokuhan uses on their power connector tracks, to my power packs so that I can connect them easily to the tracks. On some of my modules the wiring was less than stellar, so I had to correct them. I checked all three connections on each module, which took a lot of time but was well worth the effort since I know they are all good now.

With the power delivery gremlins banished I was able to put a train on each track and started running them around. It was then I found tracks not connected correctly, or misaligned, within the modules. So I spent a couple of minutes correcting those issues. Then I had a bad hump on the outer track on Dragon Bridge, so it had to be pulled up, the roadbed leveled off, and the track re-laid. Then I had a narrow gauge hopper consistently derailing...but that ended up being a car issue and not a track issue.

Finally I had everything running smoothly, so I ran some trains for a while.

I did eventually put some cars on the standard gauge locos and ran them without difficulties. I also ran multiple engines and consists just because it was fun. I took this little video* and ran some trains all afternoon. Finally I disassembled the modules and put them away.


Now I just need to get the scenery done on them, and then maybe I can get everything evaluated and approved for running in the shows.

*Thanks to recent You Tube policy changes I have removed all videos from my You Tube channel.

Tuesday, April 23, 2019

4-4-0 Conversion Part 3

I have been asked to get on the ball and finish this conversion. My deepest apologies, I had sent the body off to be painted after I narrowed it and then the hard drive that the pictures were on crashed, so I haven't done anything with the conversion articles. Back to work on it then.

Now that the locomotive had been disassembled, it's time to narrow the body before it can be painted.

To do this you need a MicroTrains Z scale gauge, a set of calipers, a collection of #11 Xacto blades with handle and a Dremil tool with a sanding drum. I did my first one using only the MT wheel gauge without benefit of calipers, but the calipers do make this job a lot easier. I had to narrow a couple of sets of drivers for my first one because I melted the plastic on one set and destroyed the drivers, and on the second set I didn't chamfer the axle ends and destroyed the drivers trying to put them back on the axles.

To shrink the body down you squeeze the drivers in on their shafts until they fit the Z scale MicroTrains wheel gauge (or until they are .205" back to back). Be sure that the gear is centered between the drivers and then mark the ends, slide the drivers off and then cut the axle stubs off (you want to remove 0.050" from each axle end). Chamfer the axle ends to install the drivers back on and quarter the drivers (this is how I usually do it to prevent damage to the drivers). The axles will be 0.375" long when you are done.

It's easier to take the drives off and chamfer the axle ends when you are done, but pushing the drivers in and grinding/filing off the axle stubs does work. To do it this way I push the wheels in to fit the MT gauge, making sure the gear is centered between them, then mark the axles with a black magic marker. Push the wheels all the way in to the gear and cut the marked ends off of the axles. Work slowly and let the axle ends cool between cuts so you don't melt the driver centers. Quarter the drivers when you are done.

Next take a file and file the bottom plate, removing 0.050" from each side, to reduce it's width to 0.185". The rule of thumb is to file until half of the lettering is removed from each side. Now you can reinstall the worm gear and bottom plate into the loco shell and use it as a guide to narrow the locomotive wheel wells. Work slowly and carefully, you will open the tops of the wheel wells into the cavity where the worm gear resides but this is OK. A combination of #11 Xacto blades and the large sanding drum for the dremil tool works very well for this, but use a variable speed tool set to a low speed setting to prevent overheating and distorting the plastic shell. Remove the bottom plate and worm gear, install the narrowed drivers and make sure they turn freely. Remove material as necessary until they do.

For the pilot truck, cut the plastic bars that hold it to the cylinders at the ends of the slot the truck rides in, the front bar at the right side and the rear bar at the left side, to make two L shaped pieces. Pull one wheel from each axle to remove the axles from the truck, reinstall the wheel and squeeze the wheels to fit the MT gauge and cut off the stub ends. File each side of the pilot truck 0.050" to fit the narrowed axles. Reinstall the axles and wheels into the narrowed truck, making sure they turn freely.

Now to narrow the cylinders (this is optional but it does make the loco look better). Trim the bottom of each L back to the cylinders to narrow them (I really need to take some pictures of this step) and then glue the cylinders back together, installing the pilot truck as you do so. Cut the same amount off of each valve gear hanger on the locomotive body so the cylinders will fit back on. Paint the locomotive body and reinstall the cylinders and pilot truck. Don't worry about the mechanical strength of the cylinder connecting bars too much, the physical strength of the cylinders glued on to the locomotive body supply most of the needed support; the bars are there mostly just to hold the pilot truck. You can drill some holes and put in brass rods to replace the plastic if you like.

At this point the drivers, worm gear and bottom plate can be reinstalled. To reinstall the drive rods you will either have to trim the locomotive body between the drivers to clear them or bend them outward to clear the locomotive body. The locomotive body itself is now done.

In the next installment we will narrow the tender trucks and reassemble the tender. Then the tender can be reunited with the locomotive and the finished product can be tested.

Wednesday, March 21, 2018

Another Locomotive Project

One of the problems in modeling Nn3 is the lack of RTR equipment. There are a few mostly Colorado prototype locomotives but for the East Broad Top everything has to be built.

Building an Nn3 locomotive usually involves starting with a Marklin chassis. In the case of the surviving EBT Mikados the 8827 Class 41 Marklin Mikado is a good starting spot, the drivers are a touch too small but with the oversize flanges the dimensions are about right. The same chassis is used for all the Mikados, and a kit is available for them through Republic Locomotive Works.

Since some of their earlier 2-8-0 locomotives were standard designs also shared by the western roads there are kits available to build them as well, and with the new PowerMax chassis you can find kits for Brill Motorcar M1 and the dinky locomotives also owned by the road. Some of the existing Marklin chassis can also be used to create the road's Mogul and ten-wheeler locomotives as well. There is one, however, that is a bit more difficult.


This is East Broad Top locomotive 11. It is a Prairie 2-6-2 locomotive and was the road's first wide firebox loco. The design was so successful that the railroad used it as the pattern for their six existing Mikado locomotives, essentially just adding another set of drivers and extending the trailing truck a bit. I have long wanted to build this locomotive but have been unable to decide how to go about it. The choices seemed to be shortening a Mikado chassis, something that I didn't feel my modeling skills to be equal to, or modifying a Marklin 8803 Mogul chassis to accept a different motor, also beyond my skills. However, there did seem to be an alternative...

This is the Marklin 8806 chassis. I first saw this locomotive on the popular online auction site but didn't have any dimensional information for it. At first glance it looked to be a promising start, the drivers appeared to be the same as the 8827 chassis and the motor is horizontal rather than vertical as it is on the 8803 chassis. However, I had problems finding one that was in a price range I felt comfortable about taking apart for a donor chassis.

And then...one came up. No box so collectors weren't interested in it, so it was had for a bit over a C note, which is about what an 8827 chassis goes for. A few clicks of the mouse and it was on its way.

When it arrived the disassembly began apace:


Once the lid was off the mechanism looked even more promising. The motor is a bit long, but the large cab of the EBT prototype should cover it adequately. There was a light board at the back of the locomotive and the frame extended back to support it, but it looks as if the chassis can be cut off aft of the rear motor mount without too many problems. The solid bottom of the motor mount platform can be filed flat as well to get rid of the arches, and the whole thing should be covered by the bottom of the cab.


With the light boards and leading and trailing trucks removed the chassis looks even more promising. The front of the locomotive is actually going to be more problematic than the back. The cylinders are going to have to go right in front of the drivers and they are mounted on a solid bar. The two options are to cut the top of the chassis flush with the front driver edge or file the bottom of the chassis in front of the drivers up to mount the bar underneath. Either way the front of the chassis is going to have to be cut away more than the rear.

The only other issue I can see is the front motor mount. It stretches the width of the locomotive and it looks like its going to hit the bottom of the boiler just forward of the cab. I am hopeful that it can be disguised behind air piping and whatnot under the running boards. At any rate I don't think it will be an insurmountable obstacle.

So all in all it looks like my prospects of having this locomotive on my roster one day is promising.

Saturday, November 19, 2016

Remotor

When I was running my little Nn3 Mogul at the train show a couple of weeks ago it got pretty hot and then stopped working. The motor has been sort of finicky lately so I figured it was probably time for some attention. It is a 3 pole and I wanted a 5 pole anyway, so I decided to swap it out.

Swapping a motor in a Marklin 2-6-0 chassis is not a simple thing to do, but with the proper tools it can be accomplished. The motor is not removed as a single unit as it is on larger locomotives, that would be too easy. Instead the magnets in their housing have to be removed and then the gear pulled off the armature shaft. Then the armature can be lifted out and swapped with the 5 pole motor. The gear is then pushed back onto the new armature shaft (the article uses a small hammer but I used a C clamp) and the magnet housing reinstalled.

The brushes for these motors are also separate, and when I opened the package to install them I found one of them defective. A quick email to ajckids, where I got the motor and brushes, netted a new set sent immediately and without further charge.

I put the brushes on and attempted to run the locomotive and had an odd little problem; the rotating commutator pulled the engineers side brush backwards out of position. Running the locomotive forward did not pull the firemans side brush out, but every time it ran forward the right side brush pulled backwards. It took a bit of bending to hold the brush in place, but it finally stayed.

Brushes installed and wheels cleaned, the motor works beautifully. The locomotive no longer needs to be started by hand, the application of starting voltage is enough all by itself now. It also runs quieter and smoother at lower speeds, all of that makes it a much more enjoyable locomotive.

I spent the evening running it in with assorted consists, and I am pretty confident in saying it is ready for the next show.


Thursday, November 5, 2015

I've Been Remiss

This came in a couple of weeks ago, but I haven't yet had the time to look at it, much less build it.

I did, of course, open the box for a quick peek and it looks like it's going to be a fun build. There is enough interior to detail it if I want to and metal castings for benches and such.

Now I just need a good place on a layout to put it.

Sunday, October 18, 2015

Incoming

I just got word today that my reserved Nn3 model of Orbisonia Station has shipped. It should be here sometime next week. This has been a long-awaited project and it is likely to be a single-shot due to the general lack of interest, which is sad, but at least it did get done.

When it arrives, work schedule and personal life permitting, I will document the build.

I just hope I can do it justice.

Saturday, June 6, 2015

Orbisonia Station

Republic Locomotive Works finally has enough orders to produce Orbisonia Station, circa 1935. This is good news for the EBT fans who want a model of the station and don't quite have the modeling skills to scratch build.

Check it out at the Republic Locomotive Works webpage.

Saturday, January 31, 2015

I've Been Working On The Railroad(s)

For the past couple of weeks I've been laying Fast Tracks turnouts on the narrow gauge, wiring them up and hooking them to Caboose Industries ground throws. I've found that the 224S, designed for Atlas code 55, is perfect for Nn3.

So far all the turnouts needed for the yard are back in. They were originally Marklin turnouts and it took a bit of fitting for the Fast Tracks turnouts to fit, but all has been arranged to work. Some of them still need a bit of tweaking but so far they work pretty good.

I brought a new plastic drawer set home today and cleared off both the 4x8 table layout and the narrow gauge that sits on top of it. The control panel has been removed from the 4x8 and the wiring has been all cut from underneath. It is now a collection of track on a piece of plywood, nothing more.

The only thing I will save is the turntable. I have no plans for it, but it will go in a box with the roundhouse and perhaps get used on something later. Tonight when Eldest Son gets home I'll have him help me take the narrow gauge off the top of the 4x8 and then deconstruction of the table will commence.

I'm also going to start clearing some of the things out of the room that I have never used and have no plans for, there is quite a bit of that hanging around. I'll probably end up with a bunch of cabinets lining the outside of the room with the layout(s) on top of them.

The clearing of this first permanent layout that was never quite finished will give room for the other projects that I have in the works, and maybe I'll get one of them done before I'm all through. I have three in the works at present; the Clarinda module pair, the rock quarry, and the narrow gauge.

On another note, the track has been ordered for the Z scale layout. I haven't figured out where it will live, but I'll make room for it. I'm using Micro-Trains Micro-Track so that I won't have to hand lay any turnouts (the AZL Mikado is very finicky about its track work, it won't run on the narrow gauge but the GP7 will) and it will be a city scape.

The tentative track plan is below.

And that's what I've been up to lately.

Friday, June 27, 2014

Back It Up

The Bachmann 4-4-0 conversion I have never did want to back up. Any attempt to reverse this loco would cause the locomotive to roll over and fall off the tracks.

I finally figured out what the problem was. I have a non-Bachmann screw in the loco to tender connection because I lost the original and couldn't find a replacement. The problem was the original screw was shouldered and the replacement was not.

The tender connection is a large open loop that goes around the screw. With the standard shouldered screw the shoulder fills this hole pretty well, with the replacement, not so much. So, when the loco would back into the tender it would get close enough that the driveshaft would bind against the loco body and tip it over.

I filled the tender loop with a piece of scrap styrene, drilled a smaller hole for the screw, and just like magic the problem is solved and the loco will back happily around the layout with it's train preceding it, no problems at all.

I only wish my standard gauged Bachmann 4-4-0's ran this well.

Thursday, November 7, 2013

EBT M-1?

Roy Stevens on the Nn3 list has been busy creating Nn3 items in his Shapeways shop. Unfortunately many of his creations are un-printable due to resolution issues for these small items, but I have gotten copies of the things I have been able to.

One of those things that I have often wished for was the East Broad Top's M-1 gas electric motor car.

Looks like I'm getting my wish!

It is printing now, when it gets here I'll do a build post.

Pinky swear!

Wednesday, July 31, 2013

Projects

Today in the mail I got these:

I've already made one of these, so I'll use them to make one of these.

That's the only drawback of modeling the East Broad Top in Nn3, you have to make your own passenger cars, but then again that's where the fun is.

Friday, February 15, 2013

Dreams Coming True?

I am of the firm opinion that one of the best things to happen to model railroading is 3D printing. Using 3D printing we have access to make a lot of things at a reasonable cost, and one of the things I have always wanted was a model of the East Broad Top's gas-electric railcar M-1 in Nn3. So far as I know there is only one hand-built example in existence, and I don't have the confidence in my abilities to make another one.

With the advent of 3D printing the only thing that needs to be done is create a CAD model to fit over a prime mover. Searails has recently introduced a power truck that would be perfect for the project that is now sold through RLW, and I have been working at getting the information to the 3D modeler that created the EBT 2 and 3 bay hoppers that I built earlier. Now that he has it, he is hard at work in the creative process.

Maybe soon I'll have my very own M-1 roaming my narrow gauge rails. I suppose I'd better get started on getting them done. Towards that end my Clover House wide tie strips have arrived, so when I get the chance (between Mustang activities and finally completing my associates degree) I'll get the turnouts fixed and maybe try to mount one. I have an idea that I can mount the turnout on a piece of basswood for stability and then use a Caboose ground throw to actuate it, but I'll have to make a spring arrangement to keep from over-extending the throwbar and breaking the points loose from it. The trick will be getting a thin enough basswood piece to blend in with the cork roadbed and yet have it strong enough to hold everything in place. I might end up using birch instead, I'll have to see what is available. The second challenge will be getting everything fastened down securely and permanently enough to work full time, I have a feeling I would be better served to fasten the PC ties down rather than rely solely on the Pliobonded wood ties.

After the trackwork has been completed I'll get some foam and finally get serious about learning how to do scenery. It should be fun!

Sunday, May 27, 2012

Passenger cars

Three of the four Shapeways passenger cars; two coaches and a baggage car. The combine was, unfortunately, destroyed by my rough handling. These cars are fragile!


They are smaller than the converted Bachmann cars I have, they aren't as tall and have no letterboard. Part of this is due, I think, to the RLW roof I have on Coach 24. I should have trimmed off some of the Bachmann's letterboard, in comparison to the Shapeways car it looks encephalitic.

Parlor car 20 has the original Bachmann roof so it isn't as bad, but it is still taller than the Shapeways cars. The picture is a bit blurry because the camera chose to focus on the background (one day I'll have to learn to use the settings instead of the automatic functions), but it shows the difference in car heights. (Yes, I know, I need to put battens on the parlor car under the window trim. Yes, I know, the center window isn't actually on center on one side of the prototype. It's an N scale model, give me a break.)


One thing I should have done and didn't is put "glass" in the Shapeways cars. I didn't think it would make a big difference, but it definitely does. Clear plastic from the coupler packages would have filled the bill quite nicely. I will do this in the future, but the roofs are glued on these cars and they would be destroyed if I tried to remove them, so they are going to stay the way they are.

In conclusion, the Shapeways cars are a quick and easy (and inexpensive) way to expand your varnish fleet, they are easy to assemble and the results are good. Just be careful with them and they should do fine.

Saturday, May 26, 2012

Shapeways

As expected the Shapeways cars arrived just in time for the trip to Florida.

When I got back I was able to get them painted up and I have assembled one of the three bay cars. Unfortunately one end platform on each of the two bay cars have been damaged, so I will have to rebuild them before I can put them together.


The cars are much easier and therefore quicker to build than the RLW ones because the end platforms are already built. For this initial evaluation I didn't bother building anything else up, but the cars can be detailed with brass wire grab irons, styrene brake platforms, and brass brake wheels like the RLW cars would be and should look pretty good when they are done.
 

First impressions of the three bay cars: They are roughly the same size as the RLW cars, as they should be. The RLW cars have a white metal bottom which the Shapeways car lacks, so the Shapeways car is lighter. This will likely cause problems with running them, but the good news is you can pull more of them.


Also nice is the trucks. For the first time ever the proper Vulcan trucks can be had. I had been using Z scale Bettendorfs, which worked but weren't quite right. Now they are right.


The trucks are available separately, so I will be putting them on the rest of my hopper fleet as well.


I also built up some of the passenger cars from Shapeways as well. They are pretty nice little cars, but they are fragile, I got the coaches done but I destroyed the combine while I was putting it together. I'll have to get another one to complete the set. The baggage car arrived without trucks, so I'll be using MicroTrains trucks on it when I put it together.  Pictures will be up soon.

Sunday, May 6, 2012

Prep Work

I finally have the bell and pilot ordered for the 4-4-0, and while I was on an ordering kick I ordered the end rails I need for these, one set each of these, and the wheelsets and couplers required for all of them.

I'm expecting them all to arrive sometime next week, just in time for me to go to Florida and help Pop-In-Law to clean out his garage and not get a chance to do anything with them.

Stay tuned!

Thursday, April 26, 2012

4-4-0 Conversion, Part 2

When we quit last time the loco was all apart and ready for the strip bath. In this installment we will disassemble the tender so that the tender shell can be stripped as well.

A note on paint stripping, I use 91% IPA (alcohol) available at any pharmacy. Be careful with it, though because plastic parts left in the alcohol too long will tend to soften. While I was stripping the loco I managed to break off one boiler stay (the rod that goes from the smokebox to the front of the pilot deck), the pilot and the bell. All of these will have to be replaced, I was going to replace the bell anyway because the one that comes on the loco looks awful big and clunky, but it also warped the loco body a bit.

At any rate, when we last saw the tender we had the trucks removed. All that is left to do is remove the red brush retainer:


and then the brushes. I work a jewelers screwdriver underneath them to pry them up, this keeps them from bending so that they will lay flat along the tender bottom when they are reinstalled.


After the brushes are removed, run a #11 Xacto blade around the perimeter of the weight on the front and pry it out.


 The motor fills the entire tender, which is why the tender is slightly oversize for the model - it had to be in order to fit the motor.


Pull the motor out of the tender body part-way. It will slide all the way out but first...


 you want to mark the top of it. If the motor goes in upside down the loco will run backwards, easy to fix for sure but just as easy to prevent in the first place. A dab of paint on the top as you pull the motor out and you will know right away how to put it back in.


The tender shell is now ready for stripping. Put all of the other pieces in your parts box, minding that the motor magnets will attract all the steel screws and side rods that we took off of the loco in the last installment. A plastic bag to hold the screws is not a bad idea anyway, and it will keep them from sticking to the motor.


I found it interesting to note that the loco body was molded in white, but the dome and stack were black plastic. I also found it interesting that the tender body was molded in clear plastic.


Now is a good time to paint the tender, but I would hold off on painting the loco until the narrowing is complete. You are going to be grinding into the wheel wells, and fresh paint will just get ruined in the process. The tender can go back together except for the trucks after the paint is dry.

That's enough for today. Next time we will narrow the wheels, pony truck and loco frame and then we will narrow the loco wheel wells to fit the new narrowed drivers. After that the loco can get painted and go back together.

See you next time!

Saturday, April 21, 2012

4-4-0 Conversion, Part 1

The victim:


This is the Bachmann 4-4-0 in N scale, in the old Jupiter paint. Note the large drive shaft between the loco and tender. The newer versions of this model have a thinner driveshaft and the paint is in blue and red to more accurately depict the Jupiter as she is now believed to have looked on the day of the golden spike ceremony at Promontory Point, Utah.

The Bachmann 4-4-0 comes in several paint schemes and in a couple of different configurations; straight stack and balloon stack. Older versions of the loco can sometimes be found for a fairly cheap price at train shows, but I have seen them go for ridiculously high amounts on that well-known auction site. If you can find one that runs decently for cheap it is an inexpensive way to get into Nn3, but be warned...it's a gateway locomotive. Before you know it you will be ordering kits from Republic Locomotive Works, then you will be getting Marklin Z scale mechanisms for your conversions, and then it's all downhill from there. But I digress.

The first step is to disassemble the locomotive. First remove the tender coupling screw:


Set the tender aside. Remove the bottom plate screw on the locomotive:


Next, remove the bottom plate and swing the drivers out of the way. The worm gear can be pushed out of the back of the locomotive.


Now pry the supports out of the valve gear hangers:


The steam chests will slide off of their tabs on the locomotive body.


Put the locomotive body, worm gear and bottom plate into your parts box. You will deal with them later. For now we will continue the disassembly of the running gear.


Remove all four screws from the drivers and remove the side rods. Be careful not to lose any of these screws! Put them and the side rods into your parts box.


Now remove the pony truck from the valve gear. You might find it easiest to cut one of the connecting bars to do this.


Now pry one of the wheels off of each axle and remove the axle from the pony truck frame.


This completes the disassembly of the running gear. Put everything into your parts box, we will disassemble the tender next.


Remove the tender truck screws and lift the trucks off of the tender. Mind the truck springs, there are two of them for each truck and they will get lost very easily.


Next remove the coupler from the coupler pocket. You will be fitting a Z scale coupler when you are all done, so these parts will not be used again.


Note the coupler spring...looks a lot like a truck spring, doesn't it? It can be used as one in a pinch.


The tender body does not have to be disassembled any further than this, it contains the motor and that is about it. If you want to take it apart to paint it be sure to mark the motor so that it goes back in the same way, if it goes in upside down the locomotive will run backwards.  I'm going to take this one apart so that the tender can be stripped, but not today.  Put everything in your parts box, we're done for today.

The locomotive body can be stripped for painting as is, the only thing left to do if you must is remove the weight from the cab. It is glued in place, work a #11 Xacto blade in and around it to break the glue bond and it will slide right out. We won't be covering that, I'm sure you can figure it out on your own.

In the next installment we will disassemble the tender so that it can be stripped for painting. In the third installment we will be narrowing the locomotive drivers and bottom plate and cutting into the locomotive body to fit them. After that we will narrow the pony truck, put everything back together, and then the locomotive will be done. In the fourth installment we will reassemble the tender body, narrow the tender trucks and install the Z scale coupler, and then we will join the tender and locomotive back together and we will be done.

Or, at least, that's the way I have it planned out.

It should be fun!