Saturday, August 20, 2022

Cotton Brute Restoration 4.5

When I last posted, I opened by saying that matching the paint is the most difficult part of this rebuild.

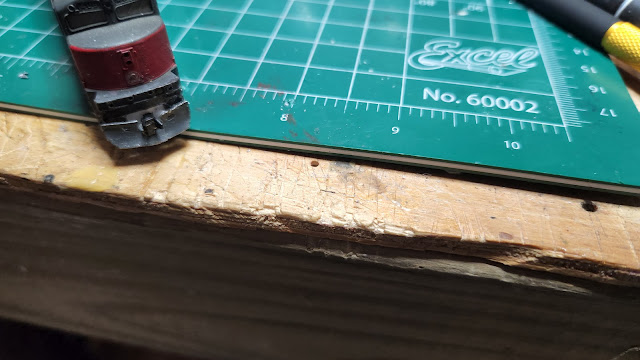
In this photo, part of the body has been painted and part has not. Can you tell which is which? If I hadn't been the one to do the painting I wouldn't be able to.

For the record, Cotton Brute Gray is a 50/50 mix of Model Color 70.866 Grey Green and Model Color 70.894 Cam Olive Green, available at your local Hobby Lobby. The red is Badger Model Flex 16-153 CB&Q Chinese Red. A shot of Dullcote blends everything together nicely.

When the paint dries completely I will paint the outer uprights of the handrails in white, and the work on the body shell will be complete (except for the addition of the air horns on the pad above the conductors side front window). I still need to build an end to the fuel tank, but now I have the proper paint color the hard part of the cosmetic restoration is behind me.

For my next project I am going to revisit the wiring. I am not happy with the way the wires are attached to the trucks, I am afraid the wires will break off if left as they are now, so I am going to see if I can find a better way to attach them. I am also going to measure and check to see if a sugar cube speaker would fit in place of one of the lead weights without fouling the driveshafts, and if so how much weight will be lost. After that the decision will be made to fit a sound decoder or a regular decoder.

But that is a tale for another time.

Wednesday, August 17, 2022

Cotton Brute Restoration 4

 By far the most difficult part of this restoration is matching the paint.

This week I have been a bit busy on other things (really, all this working for a living is interfering with my train time. It must stop, I say) so I haven't been able to get a great deal done. I did have the goal, however, of getting rid of the humpback appearance in the shell.

To that end I ordered a Sand-It from Micro Mark (one of the beneficial side effects of doing this project is I can justify getting tools to The Management) and when it came in I carefully disassembled the body at the splice points, built a jig to hold the parts square, and squared the ends up.

The results were satisfactory, except for one simple thing...the body, once reassembled, was too short to fit the frame. I had expected this, so the next step was to build some shims. I decided to put one shim in at each body join to prevent a large and overly-noticeable splice point at one spot, and also to restore a bit of detail in the roof vents.

The first step was to glue the rear body half to a thin piece of .010" styrene. I used a piece of the weight to keep the sides straight and at the proper width all the way down, and when the glue had completely dried I carved the sheet out to the profile of the inside of the shell.

The two halves were then glued together, once more using the weight piece to keep everything nice and aligned, and then I repeated the process for the end of the shell.


The end cap was then glued on, the splices shaped with various filing, cutting and sanding tools, and the whole thing test fitted onto the frame. It fit perfectly once more, and best of all, no more whale imitations.


Now comes the tedious process of paint matching. The Tamiya XF-24 Dark Gray is a very close match, but it is not quite there. It is too blue, and much to my surprise the original paint is slightly green.

I have tried mixing various paints I have on hand, but even though I get oh so close it still isn't right. I have been tempted to see if I can match the decal font and paint the whole thing, but I am going to try to find some olive drab green and make another attempt at paint matching.

I did discover by happy accident (I had to touch up a Burlington freight car and had it sitting beside the Brute to dry) that the red is Badger CB&Q Chinese Red, although the old paint is a bit weathered. Fortunately the red doesn't need any work, but if it does a quick shot of Dullcote over it will tone the new paint down to match the old (verified on the boxcar).

As a final note, I said in my last post that I should take some pictures of the conductors steps, and so I have.


Building the steps out of styrene worked better than I expected, actually. I think they turned out pretty well.

Thursday, August 11, 2022

Cotton Brute Restoration 3

 More work done today on the Brute.

The first thing I did today was rebuild the front pilot. The snowplow was up too high and was in the way of the handrail bottom mount, so I moved it down. In the meantime I found a dummy coupler to put on it. I never did like the looks of the front without a coupler, I thought the loco looked funny without one. It has one now, it is non-functional but I think it looks better.


The next thing I did was cut reliefs in the front and rear weights with the intention of installing some lights. When the loco was built it had none, but there were no surface mount LEDs at that time. Now that there are it is not too complicated to install lights in tight places.


After that I had to make a run to Nicks Trains for some supplies. I was looking for a suitable match for the paint and since the Gold Medal Model handrail stanchions had arrived I needed some brass wire to make handrails. Nicks is about the only local hobby shop left that deals in trains (exclusively so), and so I support his business any time I can.

With supplies in hand, I turned my attention to building some handrails. First the Gold Medal Models handrail stanchions were glued in place, then the brass tubing was bent to form the rails. I had one piece of the original rail left, so I was able to use that as a guide.


The body was then set aside to let the glue dry and I started in on the lights. I decided to rewire everything while I was at it, including the trucks that I had been putting off, with the proper color coded wiring for future decoder installations.

This was actually my first time working with surface mount LEDs, so I took my time and tested after the wiring to the lights was complete before installing them in their pockets.


Once the lights were installed and the wiring redone, I put the loco on the track and tested everything. All worked as it should, so I went back to the now dry shell and finished the paint and front coupler installation.

As an added bonus, the front coupler is only slightly higher than the Micro Trains coupler height gauge. I've tested it, and even though it's a dummy it is possible to connect a car to it. There is no swing to the coupler so it will probably pull anything it is coupled to off the tracks in a curve, but there it is.

I'm pretty happy with the way the handrails turned out, and the lights really add the missing element.

At this point about the only thing left to do is the front of the fuel tank and the air tank that goes between the fuel tank and front truck. I plan to scratch build it out of styrene as well, but that will wait until another day.

And with that my vacation is over. I have to go back to work tomorrow so the Brute will have to wait for a while for its fuel and air tank.


Tuesday, August 9, 2022

Cotton Brute Restoration Part 2

The restoration continues.

I took no photos of the truck removal, disassembly and cleaning but it has been done. The hard-wiring has not been completed, but the coupler has been installed on the rear truck. Micro-Trains has a coupler conversion for the Mini-Trix U30CG locomotive that served as the donor for the original build, so this was not a difficult operation. The front coupler has not been installed since that would take a complete rebuild, and possible removal, of the snowplow, and since the original build did not have one this was not a difficult decision to make. Perhaps a front coupler will be installed at a later date, but for now the rear coupler is all that it needs.

With the trucks and couplers done (but not hard wired, that is a project for another day) I turned my attention to the shell. Over the years the conductors side front step had been broken off, so something had to be done about that.

The first thing I did was file the broken area even with the bottom of the remaining step so that I would have a flat surface to build from. This made a notch from the bottom of the step to the body of the locomotive which required some fitting of the replacement piece.

A notch was cut in the piece of styrene that I was going to use for the replacement rear step support and it was carefully sanded and fitted to the broken surface. I didn't concern myself overly much with getting the width right because that would be taken care of later on.

The new step support was then glued into place and cut to the proper length.

The new bottom step was cut from a thinner piece of styrene and modeled after the engineers side bottom step. Once again I wasn't overly concerned with getting it exactly right since I was going to shape it once it was in place.

With the new pieces roughed in and glued in place, the hardest part of model railroading then began. I refer, of course, to the time it takes for the glue to dry.

Once the glue had dried sanding sticks were used to shape the replacement pieces. The rear step support is tapered from the top to the bottom, so it had to first be sanded flush with the locomotive body side and then the rear was sanded to the correct profile.

The inside of the bottom step and rear step support also had to be shaped with sanding sticks to ensure a proper fit to the chassis. I wasn't overly concerned with getting the inside shape exactly right because no one is going to see it once the shell is installed, but the outside was carefully shaped.

Two steps had to be cut and fit, then glued into place. I was careful to get the outsides right, but the insides are a little long. They will be trimmed off  and the final shaping done when the glue dries.

And now, once again, we wait.

I have ordered a set of Gold Medal Models handrail stanchions, and once they arrive new handrails will be formed from brass wire and installed. After this is done the gray paint will be carefully matched, then the new steps, handrails, and the edge of the snowplow that is showing bare metal can be painted.

But that is a tale for another day.