So there was another train show last weekend, and of course I made more purchases.
This time it was passenger cars. Four Lima PRR heavyweights, bringing the 85 foot heavyweight consists to nine, an Erie heavyweight observation car, and four Con Cor 85 foot smoothsides. One of the smoothsides is already painted for the Erie and the other three soon will be.
Three of the cars was missing the weights on the bottoms so I put the request out on the Yahoo group to see if anyone had weights. Not only did I get weights, but a full set of ConCor smoothsides that have been stripped to nothing and a handful of others that will need to be stripped and painted.
I also won a set of four ConCor smoothsides painted for the Norfolk and Western to go along with the new J class (and the old J class for that matter). So my plan is to split the undecorated cars between the Erie and the N&W to make larger consists of both.
I am also having my Lackawanna Pacific repainted since I have no Lackawanna rolling stock, so between the passenger cars and that my painter will be busy for a while. Maybe that semi streamlined Pacific will finally get some running time after the repaint.
Pictures will be posted when available.
Thursday, December 8, 2016
Saturday, November 19, 2016
Remotor

Swapping a motor in a Marklin 2-6-0 chassis is not a simple thing to do, but with the proper tools it can be accomplished. The motor is not removed as a single unit as it is on larger locomotives, that would be too easy. Instead the magnets in their housing have to be removed and then the gear pulled off the armature shaft. Then the armature can be lifted out and swapped with the 5 pole motor. The gear is then pushed back onto the new armature shaft (the article uses a small hammer but I used a C clamp) and the magnet housing reinstalled.
The brushes for these motors are also separate, and when I opened the package to install them I found one of them defective. A quick email to ajckids, where I got the motor and brushes, netted a new set sent immediately and without further charge.
I put the brushes on and attempted to run the locomotive and had an odd little problem; the rotating commutator pulled the engineers side brush backwards out of position. Running the locomotive forward did not pull the firemans side brush out, but every time it ran forward the right side brush pulled backwards. It took a bit of bending to hold the brush in place, but it finally stayed.
Brushes installed and wheels cleaned, the motor works beautifully. The locomotive no longer needs to be started by hand, the application of starting voltage is enough all by itself now. It also runs quieter and smoother at lower speeds, all of that makes it a much more enjoyable locomotive.
I spent the evening running it in with assorted consists, and I am pretty confident in saying it is ready for the next show.

Thursday, November 10, 2016
Erie PA1

I need some passenger cars for it now.
Monday, November 7, 2016
Weekend Acquisitions
Of course I cannot attend a train show without buying something, even if it's something I have absolutely no use for. The first one of those things is this:
 I had the 4-6-4 ConCor Hudson in ATSF livery and it's a pretty good running little locomotive, but when I saw these shells for it I just had to have them. I didn't know they existed, and I think they either were made by a second company or they are of a different run.
The original locomotive shell is held on by a single screw but there is no hole in the Pennsy shell for it. That means when handling the locomotive now it is imperative you pick it up by the cylinders in the front and the trailing truck/tender in the back, or else you just get a handful of shell.
The original tender shell is held on by four clips, two in front and two in back, but the Pennsy shell only has the front clips. I also had to cut out the front of the tender shell to clear the wiring, which is another reason I think they were either second party or a different run. It is held on pretty well in the back by friction alone though, so it doesn't come off like the locomotive shell.
Truth be told though, I'm not sure just how much I like the Pennsy shells. To begin with the PRR never had a Hudson type wheel arrangement so the shells are pure fantasy, but rule number 1 (it's my railroad and I'll run what I want) applies. Added to that is the fact the loco shell either needs a screw hole drilled or will require special handling. Last but not least...I'm just not sold on the looks. If I want a streamlined locomotive I'll just lease one of the N&W Class J's since I have two of them now.
Which brings me to my second purchase of the weekend:
 I saw N&W 601 in it's Spectrum jewel case with the tag "does not run" on it for $40 on Friday when I was helping the club set up for the show. Saturday it was still there. I tried really hard to talk myself out of it, but when it was still there on Sunday I finally asked the man about it. He didn't know what was wrong with it, it was a used locomotive that he had gotten in a lot. I bought it and took the shells off the loco and tender only to find the left wire was off the tender plug.
A couple of seconds work with the soldering iron and lo and behold, it runs beautifully!The headlight doesn't work (the backup light does) so it still needs a bit of TLC(EDIT: One wire off the light board, a touch with the soldering iron and everything is fully operational), but $40 for an operational Spectrum J class is a pretty good deal. I'll probably just replace the entire wiring harness like I did with the 611, the original wiring harness are junk in my opinion. I even have a decoder to go into it!
The weekend concluded with a Veterans Day dinner at McCormick and Schmicks with my lovely and generous wife who let me play trains all weekend with nary a complaint. She had other things to do so she wasn't sitting alone at home being a model train widow, so I'm certain that helped. She didn't complain about my purchases, either, although she did remark that I had more things to pull with than I had things to pull.
This is absolutely true, so perhaps I need to invest in some N&W passenger cars...two sets of them now since I have two locomotives to pull them. I also have an Erie PA1 in the mail, the kind her great grandfather drove after the Erie retired his beloved Pacific, so I'll have to find some cars for it to pull as well. When I said as much she agreed, so I have her consent (another reason why she is just so awesome).
Life just doesn't get any better than this.

The original locomotive shell is held on by a single screw but there is no hole in the Pennsy shell for it. That means when handling the locomotive now it is imperative you pick it up by the cylinders in the front and the trailing truck/tender in the back, or else you just get a handful of shell.
The original tender shell is held on by four clips, two in front and two in back, but the Pennsy shell only has the front clips. I also had to cut out the front of the tender shell to clear the wiring, which is another reason I think they were either second party or a different run. It is held on pretty well in the back by friction alone though, so it doesn't come off like the locomotive shell.
Truth be told though, I'm not sure just how much I like the Pennsy shells. To begin with the PRR never had a Hudson type wheel arrangement so the shells are pure fantasy, but rule number 1 (it's my railroad and I'll run what I want) applies. Added to that is the fact the loco shell either needs a screw hole drilled or will require special handling. Last but not least...I'm just not sold on the looks. If I want a streamlined locomotive I'll just lease one of the N&W Class J's since I have two of them now.
Which brings me to my second purchase of the weekend:

A couple of seconds work with the soldering iron and lo and behold, it runs beautifully!
The weekend concluded with a Veterans Day dinner at McCormick and Schmicks with my lovely and generous wife who let me play trains all weekend with nary a complaint. She had other things to do so she wasn't sitting alone at home being a model train widow, so I'm certain that helped. She didn't complain about my purchases, either, although she did remark that I had more things to pull with than I had things to pull.
This is absolutely true, so perhaps I need to invest in some N&W passenger cars...two sets of them now since I have two locomotives to pull them. I also have an Erie PA1 in the mail, the kind her great grandfather drove after the Erie retired his beloved Pacific, so I'll have to find some cars for it to pull as well. When I said as much she agreed, so I have her consent (another reason why she is just so awesome).
Life just doesn't get any better than this.
Sunday, November 6, 2016


Friday, October 28, 2016
Projects
I get these plastic boxes from work, they contain consumable parts and when they are empty they become trash. They are useful for a number of things, and in fact they are sold for scrapbooks at craft supply stores like Micheals.
They stack on top of each other, but since I have so many of them it is sometimes a royal pain to get to things that are on the bottom. So today instead of going to the dentist I made this:


They stack on top of each other, but since I have so many of them it is sometimes a royal pain to get to things that are on the bottom. So today instead of going to the dentist I made this:
The boxes are now easy to get to, no matter which one you are looking for. It works very well, and in fact I have been commanded by She Who Must Be Obeyed to make a couple more of them; on for SWMBO and one for Mother In Law.
I did reschedule the dentist visit.
Tuesday, October 18, 2016
Here Comes Another One
I acquired another Minitrix K4, this one in Santa Fe livery instead of PRR.
The only difference between this one and the two previous ones is this one only has a single wire connection to the locomotive (even though the second wire's hole is present on the back of the locomotive cab) with the front truck conduction being handled by way of a stiff wire to the locomotives trailing truck. Either way it suffers from the same pickup woes as its sisters, and when I attempted to remove the tender shell I found it had been glued to the tender frame.
Fortunately for me these locomotives have long been kitbashing fodder, so there are more than a few orphaned tenders out there, and without a great deal of effort I managed to get one. I shaved off the extra detail on the pilot as I had done with my previous locomotive and installed the replacement tender, which was painted in the Pennsylvania Railroad livery, and with a quick bit of IPA the lettering came off the cab, so I now have three PRR K4 locomotives.
I think I will spend some time on this one to see how good I can make it look.
That's Better
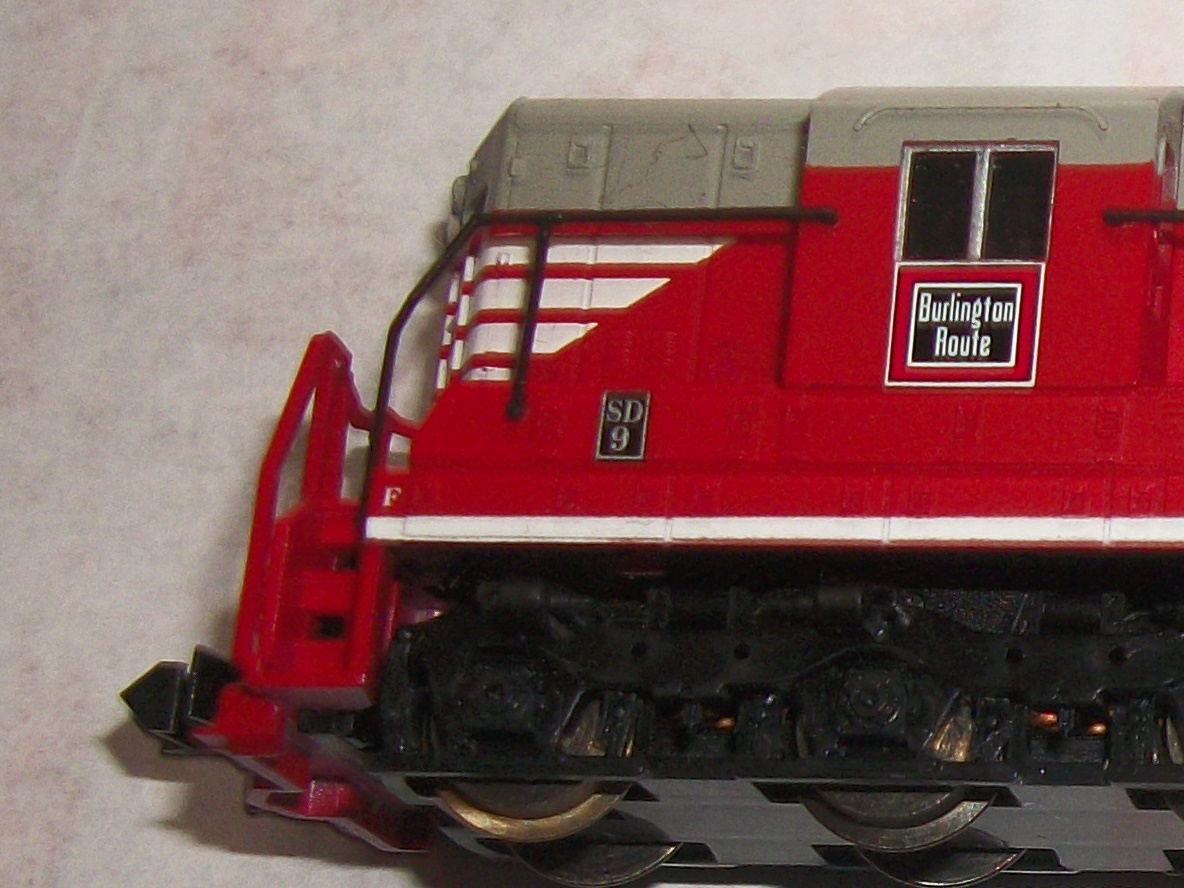
Ever since I did the truck modification on my SD7/9 (whatever it really is see picture below) and attempted the first DCC decoder installation I have been disappointed with the pulling power of the locomotive. Before I started messing with it the darn thing would pull like a plow team, but since then it has been slipping and losing traction all over the place.
I thought maybe the wheels were dirty, so I picked it up, flipped it over and started checking the wheels...only to find out all three sets of wheels on the rear truck were freewheeling. D'oh! It seems that during the reassembly I let the idler gear that transmits the power from the worm gear (the worm is the one on the motor, the worm gear is the one that the worm engages) to the wheel gears slip to the wrong side, so it not only was not engaging the worm gear, but it also was not engaging the wheel gears.
Since the truck modification more or less permanently installs the trucks to the frame I had to remove the worm from the tower and fish the worm gear out through the top. I was then able to slide the idler over into the right place, reinstall the worm gear and the worm, and voila! the damn thing pulls like a plow team again.
This is a good thing since I decided that I didn't have a team track at my freight station and really needed one. This of course means I have to have a flatcar or two and maybe a few more boxcars and such so that various deliveries can be made to the team track. More cars means the engine has to be able to handle more load, which it certainly couldn't do as a Front Truck Drive only locomotive.
After initially working well, however, the turnout I put on the team track has decided it really doesn't want to conduct power to the diverging route any more. I should have put a feeder on the team track anyway, so it looks like the easiest corrective action will be to do just that. I also have a rail joiner or two that isn't conducting, so either I need to put in more feeders or I need to solder some joiners.
Either way, it looks like I have a future engagement with my soldering iron.
 UPDATE: Well, it looks like that question is solved at least. And, since there is an F on the short hood side it looks like the Burlington ran their locos short hood forward, which means I have it wired backwards. Of course.
I thought maybe the wheels were dirty, so I picked it up, flipped it over and started checking the wheels...only to find out all three sets of wheels on the rear truck were freewheeling. D'oh! It seems that during the reassembly I let the idler gear that transmits the power from the worm gear (the worm is the one on the motor, the worm gear is the one that the worm engages) to the wheel gears slip to the wrong side, so it not only was not engaging the worm gear, but it also was not engaging the wheel gears.
Since the truck modification more or less permanently installs the trucks to the frame I had to remove the worm from the tower and fish the worm gear out through the top. I was then able to slide the idler over into the right place, reinstall the worm gear and the worm, and voila! the damn thing pulls like a plow team again.
This is a good thing since I decided that I didn't have a team track at my freight station and really needed one. This of course means I have to have a flatcar or two and maybe a few more boxcars and such so that various deliveries can be made to the team track. More cars means the engine has to be able to handle more load, which it certainly couldn't do as a Front Truck Drive only locomotive.
After initially working well, however, the turnout I put on the team track has decided it really doesn't want to conduct power to the diverging route any more. I should have put a feeder on the team track anyway, so it looks like the easiest corrective action will be to do just that. I also have a rail joiner or two that isn't conducting, so either I need to put in more feeders or I need to solder some joiners.
Either way, it looks like I have a future engagement with my soldering iron.
Sunday, October 2, 2016
Success!!!
My last DZ126 Digitrax DCC decoder has been installed into the SD7 SD9 (explanation below).
There were a few things that were kinda screwy, and it's probably all my fault anyway but I did get everything straightened out.
First off, when wiring in a decoder the red wire goes to the right side pickups of the locomotive and the black wire goes to the left. The motor brush that once was connected to the right gets the orange wire and the other motor brush gets the gray wire.. The blue wire goes to both headlights, the yellow wire goes to the back light and the white wire goes to the front light.
Before the mod the bottom brush on the locomotive was connected to the right contacts and the top brush was connected to the left contacts. I wired up the decoder as specified with the orange wire to the bottom motor contact and the gray to the top motor contact, and then I put it on the track.
Operating in DC mode the lights did not come on at all, which I thought was kind of screwy but OK. Then I connected the DCC controller and programmed the loco...and the wrong headlight came on. The motor however ran just fine, just like it was supposed to, so no big deal. Back to the soldering bench, reverse the yellow and white wires and now the headlight on the leading end of the locomotive comes on when it is supposed to.
However, there was another problem, and the headlights should have clued me in. You see, when I actually paid attention to the NCE controller display I found the locomotive was running backwards.
How this happened I have no idea, but the instructions were clear so I should have known; the instructions clearly state to connect the gray wire to the bottom motor tab and the orange wire to the top (the link goes to a TCS decoder installation page but the wire colors are identical). Why the locomotive ran properly in DC is anyone's guess, perhaps I was incorrect in thinking the red side contacts were the positive leads.
At any rate the issue is easily solved, back to the programming track and change the locomotive direction bit (CV29 bit zero) and all is well. This bit is supposed to be used to reverse the direction of the loco in consists or when you want to run it backwards; IE if it is designed to run long hood forward like the SD9.
In my case I wanted the loco to run short hood forward; if I had wired the motor correctly it would have and I would not have had to swap the lights. The direction bit isn't supposed to be used to correct motor wiring, but since I had already switched the headlight wiring it worked out.
Or maybe, since the only difference between the SD7 and the SD9 was the prime mover (the diesel motor), and since (according to the Wikipedia article) Burlington locomotive 346 is actually an SD9, I had it wired correctly all along...except for the original headlight wiring, which was incorrect because I mistakenly thought the short hood was the front.
 UPDATE: Or not...the F on the short hood end indicates the front, which means I did have the motor wired backwards to begin with...and now the headlights too. Of course. And, the locomotive is clearly marked as an SD9. And also of course, the answer was right there all along.
Anyway, it now has a decoder, the decoder works, it programmed correctly, and I have it running in the direction I want it to run. Also, with the previously DCC'd K4, the entire railroad is now DCC when running the usual locomotives, and I now have seven locomotives I can run on the club tracks (well, six actually since the first loco I successfully converted, a Model Power Pacific, is in for repaint).
And now I am all out of decoders, at least until the broken one returns from Digitrax. I haven't yet decided what my next victim will be...
There were a few things that were kinda screwy, and it's probably all my fault anyway but I did get everything straightened out.
First off, when wiring in a decoder the red wire goes to the right side pickups of the locomotive and the black wire goes to the left. The motor brush that once was connected to the right gets the orange wire and the other motor brush gets the gray wire.. The blue wire goes to both headlights, the yellow wire goes to the back light and the white wire goes to the front light.
Before the mod the bottom brush on the locomotive was connected to the right contacts and the top brush was connected to the left contacts. I wired up the decoder as specified with the orange wire to the bottom motor contact and the gray to the top motor contact, and then I put it on the track.
Operating in DC mode the lights did not come on at all, which I thought was kind of screwy but OK. Then I connected the DCC controller and programmed the loco...and the wrong headlight came on. The motor however ran just fine, just like it was supposed to, so no big deal. Back to the soldering bench, reverse the yellow and white wires and now the headlight on the leading end of the locomotive comes on when it is supposed to.
However, there was another problem, and the headlights should have clued me in. You see, when I actually paid attention to the NCE controller display I found the locomotive was running backwards.
How this happened I have no idea, but the instructions were clear so I should have known; the instructions clearly state to connect the gray wire to the bottom motor tab and the orange wire to the top (the link goes to a TCS decoder installation page but the wire colors are identical). Why the locomotive ran properly in DC is anyone's guess, perhaps I was incorrect in thinking the red side contacts were the positive leads.
At any rate the issue is easily solved, back to the programming track and change the locomotive direction bit (CV29 bit zero) and all is well. This bit is supposed to be used to reverse the direction of the loco in consists or when you want to run it backwards; IE if it is designed to run long hood forward like the SD9.
In my case I wanted the loco to run short hood forward; if I had wired the motor correctly it would have and I would not have had to swap the lights. The direction bit isn't supposed to be used to correct motor wiring, but since I had already switched the headlight wiring it worked out.
Or maybe, since the only difference between the SD7 and the SD9 was the prime mover (the diesel motor), and since (according to the Wikipedia article) Burlington locomotive 346 is actually an SD9, I had it wired correctly all along...except for the original headlight wiring, which was incorrect because I mistakenly thought the short hood was the front.

Anyway, it now has a decoder, the decoder works, it programmed correctly, and I have it running in the direction I want it to run. Also, with the previously DCC'd K4, the entire railroad is now DCC when running the usual locomotives, and I now have seven locomotives I can run on the club tracks (well, six actually since the first loco I successfully converted, a Model Power Pacific, is in for repaint).
And now I am all out of decoders, at least until the broken one returns from Digitrax. I haven't yet decided what my next victim will be...
Friday, September 30, 2016
DCC'ing
I have four Digitrax decoders.
I put one into a Minitrix K4. It doesn't work. I open it up and find the black wire has somehow gotten cut and is touching the gray wire. D'oh!!!
I have three Digitrax decoders.
I install one in a Minitrix K4. It doesn't work. I open it up and can find nothing wrong. I remove it and the locomotive still doesn't work. I clean the motor brushes and now it works. I give up on this Minitrix K4.
I may have three Digitrax decoders.
I install the suspect one into a Bachmann Spectrum N&W J class. It works. I am happy.
I have two Digitrax decoders and a locomotive with DCC.
I install one into a different Minitrix K4. It works. I am happy. I also now have four Pennsylvania Railroad locomotives with DCC; two Bachmann GP7's with factory decoders, one Model Power Mikado that I got the bugs worked out of last weekend, and the K4.

Friday, September 23, 2016
T-TRAK: The Adventure Begins
I don't remember if I mentioned that I have recently joined the North Raleigh Model Railroad Club. Just this past weekend I attended the Great Train Show at the Raleigh fairgrounds with the club and had an opportunity to debug and run the Model Power Mikado that I had put the DCC decoder in.
Apparently somewhere along the line I had reversed a wheelset, but since the Model Power inexplicably uses axle wipers for pickup power instead of the 4 wheel pickups that are found in the Bachmann Spectrums and Kato Mikados the connectivity was so horrendous that I didn't notice it. This made the loco stall in various spots around the layout and when I cleaned the wheelsets and axle wipers it caused a dead short on the track.
Some quick investigation with a multimeter and the offending wheelset was found and reversed, and the Mikado happily pulled a coal drag around the mountain track all day Saturday. I was hoping to get a decoder put into one of the K4 Pacifics but alas it was not to be, I don't know what is going on with that loco but it is pretty annoying...kind of like the SD7.
At any rate, running on the club layout really gives the locos a chance to stretch out and show their stuff, something they really can't do on the cramped setup I have at home. Unfortunately I really don't have the room here to build N-TRAK modules, but thankfully there is an alternative...T-TRAK!
My plans are to build some T-TRAK modules for show and also maybe for use at home since they are small enough to sit on a table when they are in use and don't take up much storage space when they are not. But of course, me being the glutton for punishment I am, I insist on putting Nn3 on my modules, which as far as I can tell has not been done before.
My intentions are to use Rokuhan Z scale roadbed track 220mm curves at 38mm (1.5 inches) elevation. This puts my Nn3 trackage a little over an inch and a half from the standard gauge and high enough that I can run a spur of standard gauge underneath the narrow gauge if I want to, as long as I don't use tall cars on the spur.
Rokuhan does not have sectional track in the proper lengths to make multiples of 310mm, but fortunately they do have flextrack. This comes in 330mm lengths, so a single piece of flextrack will suffice for each module. I'm planning on soldering the feeders to the track so connections shouldn't be an issue either.
I'm not a big fan of the toylike looks of the Rokuhan turnouts but I'm not planning on having any on these first six modules anyway, and when I do there is always FastTracks. I have several of those to use so I won't have to build any more right away, either. I'm also not a fan of their method of putting power to the track, so I'll be soldering feeders to the rail joiners on the corner modules.
So far I have all the track I need, both the Kato Unitrack and Rokuhan, and I have just ordered all the connectors that will be required. Next is to get the lumber and foam and start building.
Maybe I'll even be able to get this project done.
Sunday, September 11, 2016
Sigh
I tried to put a decoder in a K4 last night.
I failed miserably.
One of these days I'll be able to do this without all this bother...I hope.
I failed miserably.
One of these days I'll be able to do this without all this bother...I hope.
Friday, September 9, 2016
Pilot Program
One of the biggest visual eyesores of the Minitrix K4, in my opinion, is the pilot.
I like the looks of the pre-war pilot, that's not it. It's just the way that it is attached to the front of the locomotive shell instead of being free floating. To attach it there is a fair amount of structure that was not present on the prototype.

I took a look at it to see what I could do about it, and I came up with two different ways to reduce this visual aberration. The first way is to detach the pilot from the shell and attach it to the frame, unfortunately this is not easy to do. The second way is to carve away as much of the offending structure as possible while still leaving the pilot attached to the shell.

The pilot that was left attached got all of the plastic between the steps trimmed out, as well as all of the structure around the sides. A piece of plastic was then added to the bottom of the smokebox to prevent light from the headlight leaking out and illuminating the pilot truck. I need to paint the frame that is now exposed but I think it looks a lot better.

The second method was to cut the pilot from the shell and then attach it to the frame. To do this I sanded off all of the top step and then put new top steps on, attaching the backs of the steps to the frame. It's not the best looking way to do it, the pilot is farther forward than the other locomotive, but it does look better than the way it came from the factory.

The biggest problem with the second method is now I can't swap another shell onto the chassis unless I detach the pilot again. Another problem is the cylinders are not the right size or style because the chassis is of European design and was used for the K4 because it was close enough.
I wish I was good at 3D design, I'd come up with a better solution and make it in Shapeways. Both ways look better than the original at any rate. It should do until I can afford the Bachmann locomotives I guess.
Sunday, July 17, 2016
I've Been Working
The other day Mrs Hades asked me to clear off some bookshelves that I had under the train table so that she could use them.
This led to a multi-hour cleaning and repacking session which culminated in my taking apart the pedestal for the long-gone 4x8 layout.
At which point Mrs Hades asked if I could build a work table out of the old pedestal, and when I said I could she insisted I do so.
 This gave me a place to put all the clutter that was on the layout itself, so for the first time in a pretty long time there is nothing on the layout table that will not eventually find a permanent home there.
 Just in time, too, because the second of my Pennsylvania Minitrix K4 locomotives arrived the other day, along with a new set of Bachmann tender trucks to put on it.
 So now I have a semi-matched pair of Minitrix K4 locomotives. The new one doesn't run as smoothly as the old one so I may end up putting the motor kit that I have on order into it instead of the one I ordered it for.
Today I cleaned and lubricated the trucks on the SD7 and got it to run like it should and repainted the tender and streamlining boards on the newest Model Power Pacific. I think I'm going to paint those side boards red to match the Bachmann J class, I think it would be a good look for that locomotive.
A pretty good week for playing with trains.
This led to a multi-hour cleaning and repacking session which culminated in my taking apart the pedestal for the long-gone 4x8 layout.
At which point Mrs Hades asked if I could build a work table out of the old pedestal, and when I said I could she insisted I do so.


Today I cleaned and lubricated the trucks on the SD7 and got it to run like it should and repainted the tender and streamlining boards on the newest Model Power Pacific. I think I'm going to paint those side boards red to match the Bachmann J class, I think it would be a good look for that locomotive.
A pretty good week for playing with trains.
Sunday, July 10, 2016
Surprise Motive Power
So this showed up on the railroad...
 I put a bid in on an auction for a nickel over the starting price and much to my surprise I won it.
This is an Atlas RS3, developed jointly with Kato. According to the information on the Spookshow listing this is the second version of this loco, made after the split with Kato in 1999, as evidenced by the plastic trucks and shell mounted Rapido couplers. It's a nice running little loco that I really have no need for, but then again when has need ever really mattered when it comes to model railroading?
I'm sure I'll find a use for it somehow.
Tuesday, July 5, 2016
Presents!
This past week we went off to see Mrs Hades family the way we did last year, and even though the rain canceled the fireworks we had a good 4th of July party there. While we were there we went to Ohio to see her Grammy, and her aunt gave me a box full of trains that had taken up space in the basement since whichever cousin it was that had them lost interest in them.
When we returned to Pennsylvania her mother added a small bag full of trains that one of her dad's brothers had lost interest in many many years ago as well. I didn't get a chance to look through them at all while I was there because the 4th is a big to-do for them so they kept me busy. They stayed in the box until we returned home, at which point I was able to unpack them and check them out.

The first thing you will notice (besides the fact my kitchen is a disaster and needs a good cleaning) is they are all HO. Other than that, the first set pictured above is a Cragstan set made by Distler of West Germany (yes kids, once there were two) sometime in the 50's. This is the set that came from Pennsylvania and included the locomotive, two freight cars, the caboose, a bag full of track and the battery controller (with no batteries, thankfully). The locomotive is interesting in that its electric motor was connected to the two drive wheelsets by way of rubber bands. Other than the fact that one band is missing and the other is completely dysfunctional the set is actually in pretty good shape, the battery terminals are not corroded and the track is all there and in good repair. The motor in the locomotive works as well, so as soon as I can find some suitable rubber bands it should run.
The controllers to the left are identical except for the name imprinted upon them, one is a Tyco and the other is an AHM. They were both included in the set from Ohio pictured below and they both work beautifully.
 This AHM set was from the mid 70's and featured an EMD GP-18 locomotive and four freight cars plus the caboose. There were also a handful of buildings in the box with this set; a barn, farmhouse (with two-holer out house), chicken coop (the picture doesn't show a roof on it, but it was there), windmill, stable, and even a dog house. There was also a station with passenger platform, a dairy bar and an interlocking tower. Two bags of people and animals and a bundle of telephone poles were also found in the bag. All of the parts to the structures were there, along with a few extras. There was a box of curved AHM track and a box of straight AHM track, all
brass rails, plus a pair of Atlas 90 degree crossovers and a single
bumper (but no turnouts at all), pictured below. Everything was in good shape and fully operational, although there were a few tie ends broken off some of the track pieces (undoubtedly from assembling and disassembling the trestle set).
This AHM set was from the mid 70's and featured an EMD GP-18 locomotive and four freight cars plus the caboose. There were also a handful of buildings in the box with this set; a barn, farmhouse (with two-holer out house), chicken coop (the picture doesn't show a roof on it, but it was there), windmill, stable, and even a dog house. There was also a station with passenger platform, a dairy bar and an interlocking tower. Two bags of people and animals and a bundle of telephone poles were also found in the bag. All of the parts to the structures were there, along with a few extras. There was a box of curved AHM track and a box of straight AHM track, all
brass rails, plus a pair of Atlas 90 degree crossovers and a single
bumper (but no turnouts at all), pictured below. Everything was in good shape and fully operational, although there were a few tie ends broken off some of the track pieces (undoubtedly from assembling and disassembling the trestle set).
 The caboose was unfortunately missing its rear truck and one set of wheels on the front truck, but the rest of the cars were in great shape. The farmhouse seemed to be a bit big, and a few of the people and animals seemed to be a little oversized as well, but that might be just my perspective as an N scaler. The locomotive ran good in forward and reverse, although it did take a bit of persuasion to move the first time. A good cleaning and lube job should have it in tip top shape immediately.
 There was a couple of extra walls for the station, what looks like a billboard with the date of 1957 on it, and a few miscellaneous unidentified pieces as well. The square piece underneath what looks like a bit of fencing turned out to be the roof of the chicken coop, so all the structures were more or less complete. The barn has a broken wall which should be easily repaired and there is a single stool missing from the dairy bar, other than that just a few signs on the station and interlocking tower and a broken mounting pin for the windmill fan are the only issues with the structures.
 The only thing that appears to be missing from the otherwise complete bridge and trestle set is the deck for the bridge itself, although the bridge sides may have been designed to just snap onto the sides of a straight piece of track.
 Since the trains all belonged to family members I am loath to dispose of them even though they are Horribly Oversized, so we will probably end up making something to put under the tree for Christmas. I was just glad to see everything more or less complete and in good shape given their age.
When we returned to Pennsylvania her mother added a small bag full of trains that one of her dad's brothers had lost interest in many many years ago as well. I didn't get a chance to look through them at all while I was there because the 4th is a big to-do for them so they kept me busy. They stayed in the box until we returned home, at which point I was able to unpack them and check them out.

The first thing you will notice (besides the fact my kitchen is a disaster and needs a good cleaning) is they are all HO. Other than that, the first set pictured above is a Cragstan set made by Distler of West Germany (yes kids, once there were two) sometime in the 50's. This is the set that came from Pennsylvania and included the locomotive, two freight cars, the caboose, a bag full of track and the battery controller (with no batteries, thankfully). The locomotive is interesting in that its electric motor was connected to the two drive wheelsets by way of rubber bands. Other than the fact that one band is missing and the other is completely dysfunctional the set is actually in pretty good shape, the battery terminals are not corroded and the track is all there and in good repair. The motor in the locomotive works as well, so as soon as I can find some suitable rubber bands it should run.
The controllers to the left are identical except for the name imprinted upon them, one is a Tyco and the other is an AHM. They were both included in the set from Ohio pictured below and they both work beautifully.


Sunday, June 26, 2016
More Fun with DCC
Did you know that when you are programming a Digitrax decoder and it asks you what you want your minimum, maximum and middle voltages to be, they don't really mean voltages?
It's true!
So, with the "malfunctioning" DCC decoder once again installed in the Mikado, and properly programmed, the Path Valley Railroad ran one day totally digital (and totally Model Power powered). The Lackawanna Pacific pulled the passenger train while the Mikado handled the freight duties.
In the process I've found that my little layout just really isn't set up to run two trains simultaneously...but then again, that's not the way it was designed in the first place. It was designed as a switching layout with the possibility of roundy-round train running, and it fills those roles admirably.
If I wanted to run two simultaneously I'd really need to put in a dedicated mainline and turn the existing main into the switching siding, that way I'd be able to orbit the passenger train while I was switching the freight. Unfortunately I just don't have that kind of real estate to play with.
Now I just have to fiddle with the SD9 until I can get it to be a good locomotive on DC again, and then I'll try once more to put a decoder in it. I don't know why I'm so hell-bent on putting DCC into that locomotive, but it's become a quest of sorts.
I'm also going to put a decoder into the K4, I just haven't decided if I'm going to wait for the new motor and gear to get here before I do it.
Saturday, June 18, 2016
On A Happier Note
Even though the DCC-ing of the SD7 did not go well (see previous post) this weekend's train work did not all go for naught.
You may remember I had some wiring issues with my J class and that I had ordered the wiring harness to repair it. I did in fact hear back from them and for $45 they would be glad to fix it for me since it was over a year old so the warranty no longer applied.
The parts came in Friday, so I declined their generous offer and installed the wiring harness myself. The new harness had much better quality wiring than the Krapton insulation on the stock set and wasn't really that hard to install. I am happy to say the J class, much like its 1:1 counterpart, is once again operational.
I also got a set of PRR shells for my Bachmann GP7's and they are happily wearing their new livery and have been programmed with their new numbers (8803 and 8303; they were both 8803 until the judicious application of a black marker changed it). I like the way they look, but now I have a pair of custom painted Northern Alberta Railroad GP7 shells that are now surplus.
Friday evening my grandson and I ran some trains, so DCC issues aside it was a pretty good weekend.
DCC...or maybe not...
The replacement Digitrax decoder came in the mail Friday.
I immediately put it in the SD9.
It ran about as well on the pulse power as the Pacific did, so I called that one a win and turned on the DCC system. The decoder programmed and all seemed well...until it was time to run the beastie.
The lights came on (in the wrong direction) but the locomotive would barely crawl. I checked the programming several times to no avail.
So I pulled it out of the SD9 and put it in a Model Power Mikado. Same deal, it programmed just fine but it wouldn't move the loco at all.
So I pulled it back out and gave up on ever getting a decoder in the SD9.
I've been told I set the speeds wrong, so I'll put it back in the Mikado and try it again when I have time. If it still doesn't work I wonder if Digitrax will take it back again...
Friday, June 10, 2016
K4
The Bachmann trucks for the Minitrix K4 have been received and installed.
The slow speed performance is vastly improved, before the locomotive would stall repeatedly unless running at ludicrous speed and even then the headlight would flash like it was sending a message in Morse code. Now as you can see it runs smoothly (albeit noisily) at slow speeds, and I have clocked it at a scale 4mph.
I have a remotor kit on the way, hopefully it will improve the low speed running even further and reduce the noise as well. The remotor kit consists of a RE13 maxon motor (a 7 pole precicion coreless motor with precious metal brushes and commutator and Neodymium rare earth magnets) and a custom built compound gear to replace the single red gear, which should give me smoother operation and better gearing.
The GP7's got a new set of duds as well, they are now sporting Pennsy shells. That means I have a nicely detailed pair of Northern Alberta Railroad shells looking for a new purpose in life.
Additionally I have purchased some Kato Unitrack and some Rokuhan Z scale which will be used to create some T-Trak modules with an elevated Nn3 line. As far as I know this has not yet been done, so it should be a first. It is surprising to me that no one has done it yet, but it should be interesting.
Happy Railroading!
Additions
An addition has been made to the blogroll.
Welcome to the High Desert.
And now, since I have one, I'm off to see what he has to say about the ConCor 4-6-4.
Welcome to the High Desert.
And now, since I have one, I'm off to see what he has to say about the ConCor 4-6-4.
Saturday, June 4, 2016
DCC
The local model railroad club, which I joined recently, is a DCC only club. So if I wanted to bring locomotives to play on the display layouts they have to be DCC equipped.
Currently I have a pair of Bachmann GP7's that came from the factory with DCC decoders, but that was all. I decided to go ahead and convert a few. First I selected my Bachmann J class only to find out the wiring going between the tender and locomotive was shot. I have an Email to Bachmann about repairing it, but I've ordered the wiring harness in case I don't get an answer. Their customer service tends to suck a bit.
Next I decided to tackle the LifeLike SD9 that I run on my home layout. Following these instructions (with the exception of completely disassembling the shell, not necessary since it comes off in one piece) I first modified the trucks for improved pickup...which I highly recommend, if you have this locomotive...and then following these instructions (with the exception of modifying the rear weight as described in these instructions) I installed the decoder.
It was then I screwed up. I didn't test it on DC as the Digitrax instructions say to do, I just put it on the programming track and attempted to program it. The system couldn't find the decoder, all it did was blink the lights. The instructions say this is A Bad Thing, so I took the power off immediately. I then tried to run the loco on DC and the lights would just flash once when I turned the throttle up.
I tried disconnecting the motor and then the newly installed LED lights one at a time to no avail, so then I just connected the power wires to alligator clips and connected the decoder directly to the programming track. The system could still not detect the decoder, so either the decoder was bad from the factory or somehow I fried it. Fortunately Digitrax will replace it free, even if I screwed it up. Now THAT is customer service!
So then I turned to my newly acquired Model Power Pacific. It ran great on DC, so why not. Installing a decoder in a Model Power Pacific is a dead simple task as long as you aren't trying to hook the headlights up, and it only took a little time to do. The loco ran forward and backwards with no problems on an oval powered by a cheap train set power pack, so off to the programming track it went!
The programming went smoothly and soon I was happily running the locomotive around the track. The problem is it won't run on DC now. Whenever I try to run it on DC it surges; full power, down to a crawl, then back to full power. My layout DC is a PWM throttle so that may have something to do with it, but it is disappointing to say the least.
And now my best running Pacific on DC is once again the ancient Atlas.
As a side note, I also acquired a new Pennsy locomotive, a Minitrix K4.
 I am disappointed to say that it runs just as poorly as Spookshow says it does (I have the one with the red gear, of course), mostly because the two drivers on the fireman's side that are wired for pickup have traction tires on them (!!! Really? You couldn't have put the traction tires on the middle drivers, neither of which are wired for pickup???), but fortunately I found some instructions to make it run better.
I have the Bachmann trucks on order (along with the J class wiring and a couple of Pennsy shells for my GP7s) and as soon as they get here I will install them and hopefully overcome it's power pick up problems. Hopefully the Motorman will return my email and tell me the good news that he has a motor upgrade kit for it as well.
So kind of a mixed bag lately railroad wise, but all in all not too bad.
Currently I have a pair of Bachmann GP7's that came from the factory with DCC decoders, but that was all. I decided to go ahead and convert a few. First I selected my Bachmann J class only to find out the wiring going between the tender and locomotive was shot. I have an Email to Bachmann about repairing it, but I've ordered the wiring harness in case I don't get an answer. Their customer service tends to suck a bit.
Next I decided to tackle the LifeLike SD9 that I run on my home layout. Following these instructions (with the exception of completely disassembling the shell, not necessary since it comes off in one piece) I first modified the trucks for improved pickup...which I highly recommend, if you have this locomotive...and then following these instructions (with the exception of modifying the rear weight as described in these instructions) I installed the decoder.
It was then I screwed up. I didn't test it on DC as the Digitrax instructions say to do, I just put it on the programming track and attempted to program it. The system couldn't find the decoder, all it did was blink the lights. The instructions say this is A Bad Thing, so I took the power off immediately. I then tried to run the loco on DC and the lights would just flash once when I turned the throttle up.
I tried disconnecting the motor and then the newly installed LED lights one at a time to no avail, so then I just connected the power wires to alligator clips and connected the decoder directly to the programming track. The system could still not detect the decoder, so either the decoder was bad from the factory or somehow I fried it. Fortunately Digitrax will replace it free, even if I screwed it up. Now THAT is customer service!
So then I turned to my newly acquired Model Power Pacific. It ran great on DC, so why not. Installing a decoder in a Model Power Pacific is a dead simple task as long as you aren't trying to hook the headlights up, and it only took a little time to do. The loco ran forward and backwards with no problems on an oval powered by a cheap train set power pack, so off to the programming track it went!
The programming went smoothly and soon I was happily running the locomotive around the track. The problem is it won't run on DC now. Whenever I try to run it on DC it surges; full power, down to a crawl, then back to full power. My layout DC is a PWM throttle so that may have something to do with it, but it is disappointing to say the least.
And now my best running Pacific on DC is once again the ancient Atlas.
As a side note, I also acquired a new Pennsy locomotive, a Minitrix K4.

I have the Bachmann trucks on order (along with the J class wiring and a couple of Pennsy shells for my GP7s) and as soon as they get here I will install them and hopefully overcome it's power pick up problems. Hopefully the Motorman will return my email and tell me the good news that he has a motor upgrade kit for it as well.
So kind of a mixed bag lately railroad wise, but all in all not too bad.
Saturday, March 19, 2016
Recently
So I bought another Model Power Pacific.

I got an alert from a model RR group on the Book of Faces about a great deal through Amazon (this is the loco but it is almost 3x the price I paid for it) and since MP's operations have been taken over by MRC I thought maybe, just maybe, MRC has rectified (SWIDT?) some of their QC issues. At any rate, I thought I would give them another chance.
The loco arrived in Amazon fashion, nicely packaged and undamaged. Upon unpacking the loco I was pleasantly surprised to see a knuckle coupler on the tender, which was actually firmly attached to the locomotive. Two points ahead, and this just from opening the box, so apparently MRC has done them some good anyway.
The locomotive went on the track and much to my happy surprise ran all the way around my 11" curves without even once lifting up its front set of drivers (the other two will pop up as soon as they enter the curves). A careful examination of all three locomotives does not reveal any differences in the way they are set up, the drivers seem to move an equal amount on each one and all drivers on all locos are in gauge as measured by a MicroTrains N scale wheel gauge, so I cannot explain why the Lackawanna loco does not lift while the B&O and Chicago & Northwestern ones do.
I put all three locos on the tracks and the Lackawanna loco runs dead even with the B&O (and they both run faster than the Chicago & Northwestern), but it is a bit noisier; I can hear gear whine out of it that is not present on the other two.
After running it in for an hour (30 min frontwards and 30 min backwards, no problems) it was time to see what it would do. This is when I ran into my first issue. The McHenry coupler, which I am not really crazy about because the shank is too long, refuses to couple automatically with the MicroTrains coupler on the front of my Bachmann shorty combine. No matter what I do it will not just back in and couple, I have to twist and wiggle the car and tender to get them to couple.
Once the cars are coupled, however, the loco pulls the entire 6 car string effortlessly. I haven't tried them on my 5 car string of Rivarrosis, this would be a tougher pull since those cars do not roll as freely as the Bachmanns do, but it runs along happily just as it should.
I experimented a bit with replacing couplers and discovered that the MicroTrains Z scale coupler goes right into the pocket vacated by the McHenry, and the screw goes right into the hole as well. Unfortunately the MT Z scale coupler has to be shimmed up to mate, but once done it works great. I don't have a short shank N scale MicroTrains coupler at the moment (one is on the list for the next train shop visit) but as soon as I do I will see if it installs just as easily. For now though the McHenry will do the job.
Since Lackawanna is not one of the roads I model it is not likely that this loco will see much use on my layout for the time being, but of course this may change if I decide to paint over the green on the semi-streamlined running boards and tender. It runs so nicely it would be a shame not to use it, after all.
So in conclusion, yay for knuckle couplers and attached tenders, not so much for noise, nice running and a big YAY for not lifting the front set of drivers on the 11" radius curves. My best running Pacific is no longer an ancient out of production Atlas (although the Atlas is my second best running Pacific).
Because of this locomotive my opinion of Model Power has been upgraded from "meh to negative" to "meh to positive" and I have a feeling that the more I run it the more I will end up liking it. Well done Model Power and MRC, may your partnership continue to pay off.
Saturday, January 2, 2016
Trials and Tribulations
I finally got the DCC setup installed and working.
Installing the system was simple, I installed a DPDT switch connected to the common rail and Atlas track switch panel, connected one side of that DPDT switch to the DC controller and hooked the DCC connection panel up to the other side of the DPDT. That way the layout is either all DC or all DCC so there is no danger of running from one into the other and causing system or locomotive damage.
Second was to program my locos. I have two locomotives, a matched set of Bachmann GP7's, that are DCC equipped. I threw all the track switches except the front main to the center off position and placed the locos one at a time on the front main for programming. One of them went just fine, but the other one didn't want to run. The lights would come on when commanded, but when I pushed the throttle up the loco moved, then the lights dimmed and it slowed to a stop.
I threw the master mode switch back to DC and tried it that way with the same results. I put the first loco back on the tracks and it wouldn't move at all. I threw the master mode back to DCC and the first loco ran like a champ again. Definitely something in its programming then, a problem for another time.
I took the shell off the second locomotive...which was a chore in and of itself, those things are on TIGHT...and removed the decoder. There are two little springy contacts that supply power to the decoder, I bent them out a bit and reinstalled the decoder, and then the loco worked as it should in both DC and DCC.
On to the first loco. I tried a factory reset according to the manual but this did not solve the issue. tried a factory reset on the second loco and then it wouldn't work on DC although it worked like a champ on DCC, just like the first one (and completely opposite of what I wanted). Off to the internets!
The issue, according to the internets, was the decoder dual mode function was set to off. The dual mode function was included in a thing called CV29, whatever that is. More digging reveals a CV is a Configuration Variable, and there is a table that shows what they all do. All very well and good, but how do I know what to set them to? More internet digging!
Fortunately the Digitrax site has some Control Variable (CV) calculators that I was able to use to determine the bit that sets the dual mode (DC/DCC) on or off. As expected, when I checked it the bit was set to off. I programmed them each for dual mode again and once more I am able to run both locos on either DC or DCC as I wish.
In my experimentation I found two of my turnouts aren't quite up to par as the locomotives short on the frogs, so I'll have to work on them a bit, but so far everything is working as it should. One thing that annoys me about this particular setup is I am apparently not allowed to run DC locomotives using the DCC controller. Not a big issue I guess since I am able to switch the master modes over, but if I had a larger layout it might become a factor.
At any rate, the NCE Powercab is working as it should and I'm having fun with it.
Subscribe to:
Posts (Atom)
