Saturday, September 21, 2019

Up And Running

I think I have the trackwork all squared away on my T-TRAK modules.

I built a standard T-TRAK end cap (180 degree curve) so that I could make a complete oval with both standard and narrow gauge tracks. I hooked everything together...or I tried to at least. I ran into troubles right away.

First I had trouble connecting the narrow gauge track. Aligning two tracks on standard T-TRAK modules is not so bad, get a double crossing track or a piece of double track with 33mm spacing and check it on each end, easy peasy. However, when you add a narrow gauge track at a higher elevation and setback you really have to pay attention to details because everything has to align in all three dimensions. If not, connecting the modules is troublesome when it's not downright impossible. And of course this was the case, I had some modules that would connect straight away with each other in one configuration but went from difficult to impossible with others or in a different configuration.

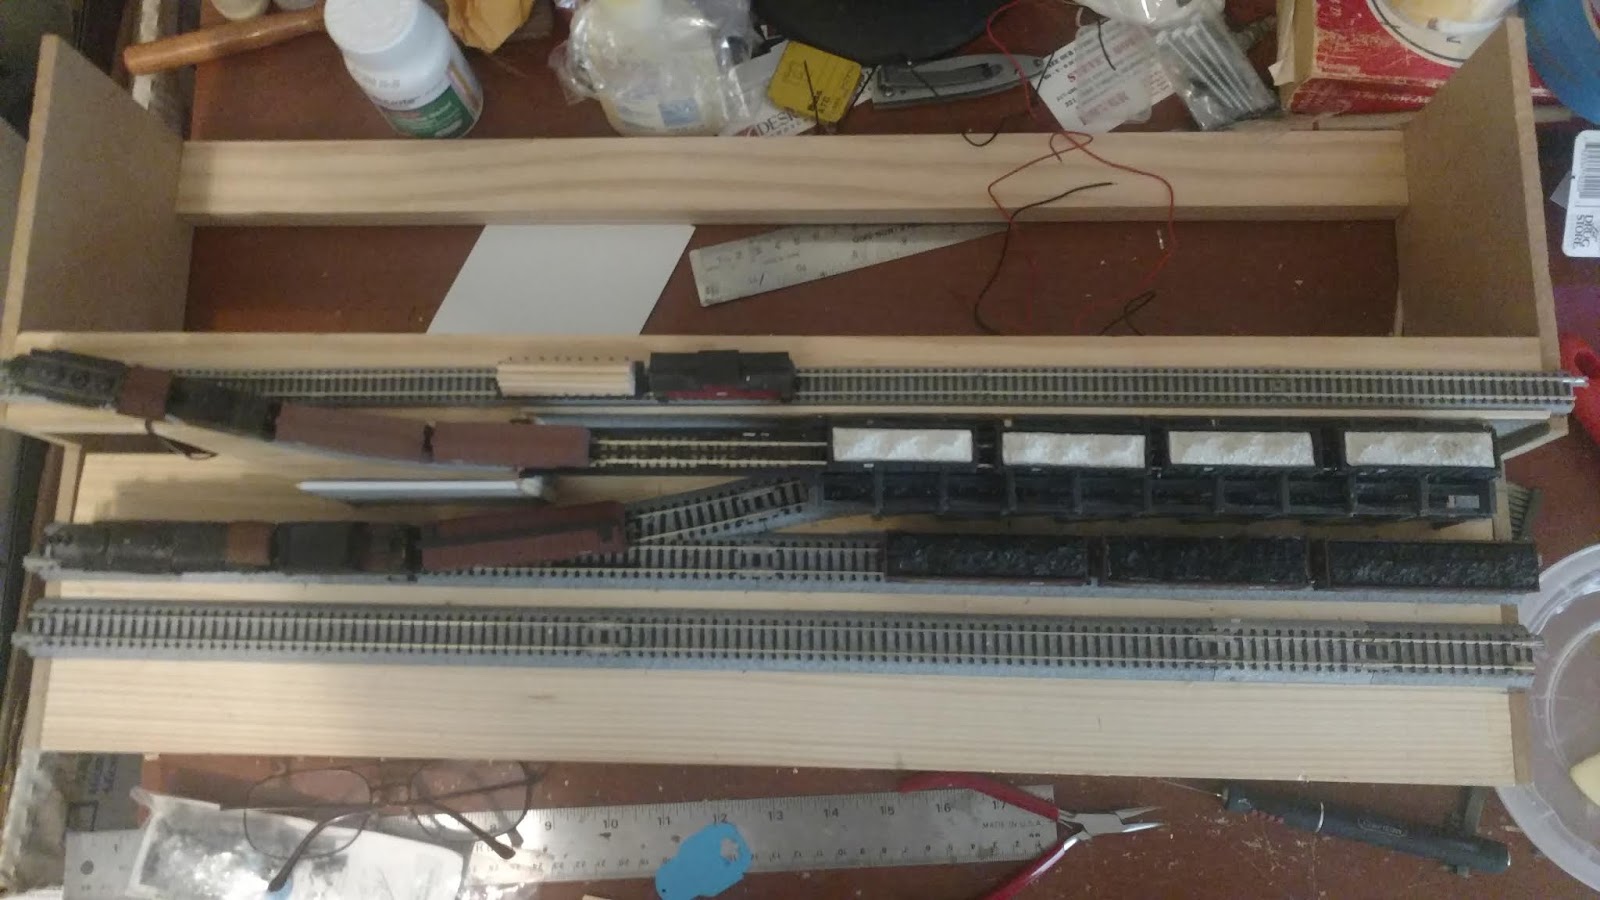
So, I had to spend some quality time with the template and shims to get everything at the exact height and depth. I had several end pieces that had the narrow gauge track either higher or lower than the others so they had to be carefully aligned, in some instances the end had to be shaved away to lower the track and in other cases it had to be shimmed higher. I also had to adjust a few tracks end to end to make sure the 2mm spacing between modules was consistent through the depth of the modules in every configuration.

I finally got everything straight, and I checked each module by connecting it at each end with every other module. Every module will connect in various configurations (really there are only about twelve possible connections since two of the modules have curved narrow gauge track and straight standard gauge and will only connect to each other in one specific combination) so it should all be good now. And then I ran trains...or attempted to...and found other issues to deal with.

First I had power delivery issues. I have connected the Tamiya connectors, which is what both Kato and Rokuhan uses on their power connector tracks, to my power packs so that I can connect them easily to the tracks. On some of my modules the wiring was less than stellar, so I had to correct them. I checked all three connections on each module, which took a lot of time but was well worth the effort since I know they are all good now.

With the power delivery gremlins banished I was able to put a train on each track and started running them around. It was then I found tracks not connected correctly, or misaligned, within the modules. So I spent a couple of minutes correcting those issues. Then I had a bad hump on the outer track on Dragon Bridge, so it had to be pulled up, the roadbed leveled off, and the track re-laid. Then I had a narrow gauge hopper consistently derailing...but that ended up being a car issue and not a track issue.

Finally I had everything running smoothly, so I ran some trains for a while.

I did eventually put some cars on the standard gauge locos and ran them without difficulties. I also ran multiple engines and consists just because it was fun. I took this little video* and ran some trains all afternoon. Finally I disassembled the modules and put them away.


Now I just need to get the scenery done on them, and then maybe I can get everything evaluated and approved for running in the shows.

*Thanks to recent You Tube policy changes I have removed all videos from my You Tube channel.

Sunday, August 25, 2019

Playing Catch-Up

It's been a month since my last post, my how time flies.

I haven't really been doing much train related this month, family vacation was the first week of the month and a family tragedy the week after kept me out of the train room for another week again. For the past week I've been spending some time on my T-Trak modules, specifically another straight double that I am building a coal dock on.


The idea is the narrow gauge hoppers get spotted on the top of the trestle and the standard gauge hoppers underneath, the coal is then dumped out of the narrow gauge hoppers into the standard gauge ones below. The narrow gauge crosses over the standard gauge track on a plate girder bridge before reaching the wooden coal trestle. Initial tests were promising.

 Four narrow gauge hoppers approximately equaled the length of three standard gauge hoppers, so the wooden trestle was built to that length.

 Bracing was added and a dump funnel was made from styrene and hung below the trestle.

 Everything was mounted to the frame and then the first problem arose. There was not enough clearance as measured with an NMRA clearance gauge between the coal dock and the inner mainline track.

 So the dock was removed and about an eighth of an inch was trimmed from the inner side to tuck the trestle in closer to the wall. Unfortunately this meant the first post was in the way of the standard gauge hoppers as they entered the chute, so it had to be removed.

 This gave the necessary clearance between the inner mainline and the coal trestle structure.


Bracing was added to stiffen the structure where the post was removed and it all works pretty well.

With the track laid and debugged the only thing left is to add some walkway boards and railings to the top of the trestle and then finish the scenery on the rest of the module.

I've also finished building the frames and laying the track for the end modules, they are going to be single straights with the standard gauge mainlines running along the front as normal and the narrow gauge curving away to the back. This means the modules have to be full depth so the narrow gauge tracks can connect in the back.

I haven't decided if I am going to put skyboards on these modules and have the tracks tunnel through them or if I am just going to leave them open so that you can see straight across them. I could make some removable skyboards but with only 2mm spacing between the backs of the modules it doesn't leave much room to play with.

At any rate with those two modules mocked up I now have six total, enough for a full loop of narrow gauge track. Now I need to get the scenery done so I can get them certified to run in the next show. That will be a while though, my work schedule will prevent me from attending shows for the rest of the year.

Maybe I'll have them ready for the big show next spring.

Monday, June 24, 2019

Mail Call

In the mail the past couple of days were two new to me Marklin Z scale locos, one USRA Mikado that was missing some pieces (motor brushes, pony truck, a couple of screws and its tender) and a Mogul that was complete. My plans are to make some Nn3 locos out of them.

I have discovered the USRA Mikado is essentially the same mechanism as the 8827 German BR41 loco which I use to make Nn3 EBT locos, the only difference is the pilot (it has an American style cow catcher) and the wheel center color (black instead of red). By happy coincidence it has a 5 pole motor so I won't have to swap them out. I had been led to believe the drivers were different sizes but I was glad to see they are not.

The USRA chassis is, in short, a much better starting point for my East Broad Top locos than the German style locos. I have a few of the 8827 chassis that I may sell off and then I'll purchase some USRA chassis instead. There are a handful right now on the auction site that don't have tenders but I'm balking at the listed prices, I think it's too high for what is essentially half the package.

As for the second loco, I have one already that I have converted into an Nn3 loco, I had to change the motors from a 3 pole to a 5 pole on that one. Much to my happy surprise the new loco is already a 5 pole. I have an RLW kit ready to put on this loco but I might change it up a bit instead of building it as delivered.

I also ordered some 5 pole motors for the three 8827 chassis I have that have three polers. I may not need them if I decide to get the USRA chassis instead, but I'll hold on to them just in case.

Friday, May 24, 2019

Dragon Falls...An Update

I've been off work for a few days and since Mrs Hades is still in school I've been at home, so I have managed to get a few things done around the house. One of those things is the Dragon Falls module.


The dragon's cave

  A look at the falls from water level

 Overall view

 Some idiot in a barrel

 Closeup of the river

 Another overall view


Rockslide and mountain meadow

I want to do a little ballasting around the base of the tracks to help blend it into the scenery, but overall I think I'm done with this module. I really like the way it turned out.

Now I have to complete the other four modules so I can put them together and run a train or two. I hope it won't take as long as this one has, but I fear that it will unless I run into another situation where I am home with no one to bother me and nothing else to do.

Given the current state of house renovations in progress I think that might take a while.

Tuesday, April 23, 2019

4-4-0 Conversion Part 3

I have been asked to get on the ball and finish this conversion. My deepest apologies, I had sent the body off to be painted after I narrowed it and then the hard drive that the pictures were on crashed, so I haven't done anything with the conversion articles. Back to work on it then.

Now that the locomotive had been disassembled, it's time to narrow the body before it can be painted.

To do this you need a MicroTrains Z scale gauge, a set of calipers, a collection of #11 Xacto blades with handle and a Dremil tool with a sanding drum. I did my first one using only the MT wheel gauge without benefit of calipers, but the calipers do make this job a lot easier. I had to narrow a couple of sets of drivers for my first one because I melted the plastic on one set and destroyed the drivers, and on the second set I didn't chamfer the axle ends and destroyed the drivers trying to put them back on the axles.

To shrink the body down you squeeze the drivers in on their shafts until they fit the Z scale MicroTrains wheel gauge (or until they are .205" back to back). Be sure that the gear is centered between the drivers and then mark the ends, slide the drivers off and then cut the axle stubs off (you want to remove 0.050" from each axle end). Chamfer the axle ends to install the drivers back on and quarter the drivers (this is how I usually do it to prevent damage to the drivers). The axles will be 0.375" long when you are done.

It's easier to take the drives off and chamfer the axle ends when you are done, but pushing the drivers in and grinding/filing off the axle stubs does work. To do it this way I push the wheels in to fit the MT gauge, making sure the gear is centered between them, then mark the axles with a black magic marker. Push the wheels all the way in to the gear and cut the marked ends off of the axles. Work slowly and let the axle ends cool between cuts so you don't melt the driver centers. Quarter the drivers when you are done.

Next take a file and file the bottom plate, removing 0.050" from each side, to reduce it's width to 0.185". The rule of thumb is to file until half of the lettering is removed from each side. Now you can reinstall the worm gear and bottom plate into the loco shell and use it as a guide to narrow the locomotive wheel wells. Work slowly and carefully, you will open the tops of the wheel wells into the cavity where the worm gear resides but this is OK. A combination of #11 Xacto blades and the large sanding drum for the dremil tool works very well for this, but use a variable speed tool set to a low speed setting to prevent overheating and distorting the plastic shell. Remove the bottom plate and worm gear, install the narrowed drivers and make sure they turn freely. Remove material as necessary until they do.

For the pilot truck, cut the plastic bars that hold it to the cylinders at the ends of the slot the truck rides in, the front bar at the right side and the rear bar at the left side, to make two L shaped pieces. Pull one wheel from each axle to remove the axles from the truck, reinstall the wheel and squeeze the wheels to fit the MT gauge and cut off the stub ends. File each side of the pilot truck 0.050" to fit the narrowed axles. Reinstall the axles and wheels into the narrowed truck, making sure they turn freely.

Now to narrow the cylinders (this is optional but it does make the loco look better). Trim the bottom of each L back to the cylinders to narrow them (I really need to take some pictures of this step) and then glue the cylinders back together, installing the pilot truck as you do so. Cut the same amount off of each valve gear hanger on the locomotive body so the cylinders will fit back on. Paint the locomotive body and reinstall the cylinders and pilot truck. Don't worry about the mechanical strength of the cylinder connecting bars too much, the physical strength of the cylinders glued on to the locomotive body supply most of the needed support; the bars are there mostly just to hold the pilot truck. You can drill some holes and put in brass rods to replace the plastic if you like.

At this point the drivers, worm gear and bottom plate can be reinstalled. To reinstall the drive rods you will either have to trim the locomotive body between the drivers to clear them or bend them outward to clear the locomotive body. The locomotive body itself is now done.

In the next installment we will narrow the tender trucks and reassemble the tender. Then the tender can be reunited with the locomotive and the finished product can be tested.

Monday, April 8, 2019

T-TRAK update - Dragon Falls

I have been working on my double straight module which I have named Dragon Falls. Here's where I am so far:

 The wedding cake was carved and Sculptamolded, then painted. Mrs Hades wanted a dragon, so his cave was carved out of the left handed peak. The river bottom was painted in anticipation of the water pour, my first attempt at this on any layout. Of course this is also my first attempt at going vertical with my scenery, so there is that.

 I painted behind the proposed waterfall to look like rock faces and I think it turned out pretty well. Note the nut in the barrel.

 Mrs Hades' dragon is guarding his stash.

 So far so good. I really like the way the rocks turned out, another first for me. Now I need to do some ground cover before getting into the water.

And speaking of ground cover I was kind of worried about putting the trees on this thing. I mean, look at those mountains, they're straight up and down! No way I can put realistic trees on them, the trunks would look ridiculous! And then I got to looking at some pictures I had taken along the Blue Ridge Parkway, in the Appalachians, which is what I'm going for, and I noticed something.


 (Nice car, huh? ;) )


 In none of these pictures do I see tree trunks! In fact, in none of these pictures do I see trees at all, I see woods. I see forest. I don't see individual trees! The trunks are hidden by underbrush and other foliage. So, perhaps this won't be so tough after all.


I had some trees from the layout I decommissioned, so I went ahead and stuck them on here. A lot of them are just wire wrapped around toothpicks and covered with ground foam, but they worked out pretty well. I then stuck some clump foliage at the bottom and around the rocks and meadow area.

I think it turned out pretty well, now I need to do the other side and get some water poured. And then...I only have five more modules to complete for a full set. So far I am pleased with the results.

Saturday, March 23, 2019

Chipping the Alco F units

I mentioned before that I had ordered some Southern Digital frames and Digitrax DZ126 decoders for the FA1/FB1 loco set that I want to put DCC in. I only ordered two frames, enough for one set, just in case they didn't work out. I could have gotten DZ123 decoders a bit cheaper, but the 126 has BEMF and better motor control, so the added cost was more than justified.

They arrived and I set to work to put them together. I'm happy to say they worked out great, I did make one modification that I will show to connect the wires and I did have to deviate from the instructions a bit for the motor wire length, but overall they were well worth the purchase price.

The first thing I did was strip down one of the locos and compare the frames.


 The left half of the frame is virtually identical to the stock frame, about the only difference (not pictured) is the tab that contacts the upper motor brush is missing on the Southern Digital frame. The right side is very different, having the relief cut out for the decoder. The pocket that the motor fits into is also deeper to allow room for the decoder wire to run to the bottom brush. This becomes important when modifying the stock frames to use on the B units.

I assembled one of the frames as per the directions and discovered that the decoder wire lengths that are specified are too short for the motor leads, they both needed to be another inch longer than the instructions said so that they would reach to the relief where the decoder sits.

The instructions also said the white magnet on the motor went to the top, but both of my motors had the white magnets on the bottom. I left the white magnets on the bottom and when I was done the locos went forward when the NCE PowerCab had forward selected and backwards when the PowerCab said reverse, so they must have been right.

The second thing is the way the wires connect to the frame. The directions say to solder the wires to the frame, but I found the solder just would not stick to the frames. So I figured out another way to do it.

On the left half there are indents cut in for some brass clips to fit in, these clips hold the plastic bearing blocks for the worm gears in place. Being brass they were easy to put some solder on for the black decoder wire.


I had noticed some indents down the sides of the frame and thought maybe the red wire would fit in the one closest to the rear of the frame. I checked, and sure enough it did. So I took my rotary tool and a cutoff disk and cut a wire channel in the top of the frame.


Next, I inserted the truck pickup strip into its spot on the right frame half and marked it where the slot in the frame was. Then I tinned the contact strip.

With the contacts figured out I soldered the wires to the motor, put some electrical tape in for added insulation, and put it in the frame with the gears.


The frame was then reassembled and the black and red wires soldered to the frame tab and truck pickup strip respectively.
 

 The red wire was then tucked into its new slot in the frame;

 and the decoder was nestled into its new home.


The trucks were put in and the headlight wired up to the blue and white wires. The directions say to just hook the white wire up but I did them both.

A note of caution, if you ever do one of these be sure to cut the traces on both sides of the light PC board. They are both connected.

I then put the assembled loco on the track and tested it out, and it all worked swimmingly. This completed chassis then went under one of the A units.

I then took a close look and noticed that with a bit of judicious filing the old frame would work for the B unit, I just had to take off enough material for the decoder to fit in the depression where the cab would be on the A unit. I used a rotary tool and cutoff wheel to accomplish this. I then cut a slot for the red wire, on the front of the frame this time, and then while holding the frame halves together cut a slot along the spine of the frame from the front to the top motor contact tab to clear the motor wires. Lastly I cut out the top motor contact tab on the left frame half.


With these modifications the decoder fits on the front of the frame with no problems. The light wires were just clipped short and taped off. The contacts were soldered on the same way as before, and the finished locomotive was tested and put under a B unit shell.

That left me a spare Southern Digital frame. As luck would have it I had another set of locomotives to modify, so the work was done and I now have not one but two FA1/FB1 sets in Erie paint.

All I have to do now is speed match them and I'll be all ready to go pull some freight.

UPDATE: When I went to speed match the locos I found the chipped units were much much slower than the non-chipped units. The non-chipped units ran a max of about 106 scale MPH (prototype top speed was about 65) while the chipped units were fortunate to find themselves above 35. I took the units apart and found the decoder wires were causing the motors to bind on the modified stock frames. So I had to cut a relief in the modified stock frames for the decoder wire and I also had to adjust the tightness of the screws holding the two frame halves together. The screws have to be tight enough to hold the frames together to slip inside the shell but no tighter otherwise the motor binds. Screw tightness also accounted for the slow speed of the Southern Digital framed units.

With those adjustments and modifications made the chipped units once again ran at the same excessive speed as the non-chipped units. I set CV's 2, 5 and 6 on each  individual unit to give each loco a starting speed of about 2 scale MPH with a top speed of 65 and a mid speed of 35. Now they all run together as they should.

I now have four chipped units and two DC only units. I'm thinking of selling the two DC units because they have the same numbers as one set of chipped units, but I may just keep them for DC only operations.

But I have them all the same.

T-TRAK

I have been building T-TRAK modules with narrow gauge track on them. The latest module is a double straight with bridges. I had planned on going 1.5 inches elevation for the narrow gauge, but I changed it up to 2" (51mm) so that I can run the standard gauge underneath it if I want to, I thought it would work out better.

 I built the base on an open front so that I could dig down into the foam to put in a bridge or two.

 At first I thought about putting in a road crossing, but it just wasn't going to line up with the narrow gauge bridge that I wanted to use. Maybe I'll get a chance to try this again and I'll just build my own grade crossing instead of using the Unitrack crossing.

 So I just decided to go with just bridges. The plan is to put a waterfall in behind the narrow gauge bridge and have the river run under both bridges off the front.

I've been carving foam and casting rocks to put on the mountains, in the pictures the mountains are pretty straight but I've carved some reliefs in and I think the rock work is going to really set it off.

Tomorrow I'm going to take the roughed in modules that I already have done, two outside curves and the straight pictured above, to the club president's house and hopefully get the OK to put them in the shows once they are finished. If I get the OK I need to do two more single straights and then figure out if I want to do inside corners or junctions to connect them up to the rest of the T-TRAK layout.

Future plans are to make a junction so that I can connect these narrow gauge T-TRAK modules to my existing layout. And when that happens more pictures will get posted. At least then I'll have some narrow gauge track put in somewhere.

Saturday, March 9, 2019

You Tube

The Path Valley Railroad now has a YouTube channel!

This channel will be used mostly to keep track of model railroad related subscriptions, but there will be a video or two loaded as well.

Come check us out!

More Projects

I have a few things on their way today.

First up is a couple of locomotive kits from Republic for that Marklin ten-wheeler chassis I told you about at the end of my last post. There aren't any ten-wheeler specific kits that I am aware of, so I ordered a C-16 kit that I am hoping to modify to fit and a Mogul kit that I have no idea what I'm going to do with but I liked it so I went ahead and ordered it. I'll have to come up with another chassis for it I guess, but it will be the 8803 series with a tender instead of the 8895 tank loco that the kit calls for. It's the same chassis, just a different bottom plate, so it will work fine.

I also ordered a pair of Southern Digital frames and decoders for one of the Life-Like PA1/PB1 Erie locomotive pairs that I have. When they get here I will use them to convert my slowest pair of locomotives, I have three sets to choose from and if I screw them up I would rather lose the set that doesn't play well with the others. If they work well I will order four more of each and convert the other two sets as well, then they can be speed matched and made to run together. I may actually end up selling one set since I have two with the same numbers, in that case I don't know if I will bother converting them or not.

I am glad to see Southern Digital makes these frames, since Aztec closed up shop they are the only game in town. I knew about Aztec frames but was completely unaware of Southern Digital, so discovering them was a happy occurrence. They also have frames for the Life Like SD7/9 that I have already converted, but I might have to order one just to see what it is all about.

With all of this in addition to the kits I already have and the modules I need to build, along with whatever Mrs Hades wants me to get done I have enough projects to last me until doomsday, I think.

Tuesday, March 5, 2019

This Week on the PVRR

Late last week the SD9 that had been sent in for warranty repairs returned, at no charge. Apparently I had turned in the little card that comes with the loco to register it, so the repair was made and the loco sent back. It took a while but the loco now runs just as well as the other one. I have speed matched them and they run perfectly together.

I am not quite sure if the loco was repaired or replaced, it came back in a different box with the decoder reset to factory specs and all the paperwork included. Either way it runs good and I have a pair of SD9's in Pennsy paint that run together as they should, both with sound. I must say I'm not crazy about the Rule 17 lighting though, but I don't know how to change that.

Today I speed matched the J class locos as well. Both of them top out at around 80 scale MPH, which is a bit slow for them since the prototypes were clocked at 100 plus. I found that they were topping out at speed step 85 (of 126) and then there was no change in actual speed from that point to the upper setting of 126. Changing CV5 got them to top out at speed step 126, CV6 has been set so the mid speed for both is right around 41 at speed step 64 and the step 1 speed is 1mph for 611 and 0.6mph for 601. They will run together when consisted, so I can double head them now. I don't know if the N&W ever did, but I can if I want to.

Unfortunately as I was putting 611 away I saw that one of the side rods had detached from the valve gear. It is supposed to have a plastic circle on the backside of it to keep it on the slide rails. That circle is gone. And, of course, this part is out of stock at Bachmann. I am going to try to put some thin brass on the loco in its place. So far I am 0 for 3 in replacement parts needed for these locos now; I need a new shell for 601 so I can rob the windows out of it, a tender shell for 601 because I cut through it to clear the decoder, and now valve gear for 611.

I refined the programming on the  semi-streamliner Pacific that was in Lackawanna paint that I had redone in Norfolk and Western as well. It now reaches a prototypical top speed and would probably run with the J classes if I chose to do so although the top speed is a bit lower than the J classes. All three of them run reliably now though. I still need to do something with the headlight on that Pacific, as well as the one on the Model Power Pennsy L2 Mikado. I am hesitant to take them apart for headlights though, since they are running now.

And on another note, the B&O Mikado that I had lost a smoke box face for got a new one, I had an old Pacific that I never could get running right and had taken apart for pieces and as luck would have it the smoke box faces are interchangeable between the two. Now all of my Model Power locos are up and running (with the exception of the Pacific that was taken apart for pieces of course).

I have yet to chip the Kato powered GHQ Pennsy L1 Mikado, I think I want to try to put a working headlight in it but I don't yet know how I am going to accomplish that. I'm thinking about SMLEDs with the wires run down to the existing Kato circuit board, I would have to put long leads on it and then try to figure out how to coil them up inside the smoke box but I am thinking that might be the easiest way to do it.

On the narrow gauge front I am the somewhat proud owner of a Marklin 8899 chassis, which is a 4-6-0. I need to get a kit for it, I'm thinking the best one would be the RLW C-16. Fortunately Marshall from RLW has decided that he would stick around as long as the orders were coming in, so I am able to get what I need for now. That doesn't mean I'm going to wait around for long, though. I also have a bunch of Republic Locomotive Works kits for EBT Mikados, boxcars and hoppers that need building as well, so I should be gainfully employed on railroad related materials for the foreseeable future.

And that's about it for now. Happy Rails!

Friday, February 1, 2019

Well...Poo.

I attempted to speed match the GP7's today.

Unfortunately it can't be done. The only CV's that can be programmed are 2 (starting speed), 3 (acceleration) and 4 (deceleration). CV's 5 (top speed) and 6 (mid speed) are non-programmable.

I have seen these locomotives modified with sound decoders, so that may be an option. Unfortunately the only decoders that seem to be compatible are out-of-production MRC's, and I'm not a big MRC fan due to the decoder that now resides in my Hudson. I don't know if their new offerings are any different but they are screwy to program and the sounds aren't anything to write home about. I have heard that putting a different speaker on them works wonders so maybe I'll try that.

Anyway, a rather disappointing day, but any day playing with trains is a good one.

Tuesday, January 22, 2019

Speed Matching

I've invested in a speedometer from Accutrack and I used it to do some speed matching.

My DCC equipped Mikados (two Model Power and one Kato) have all been speed matched and will run together flawlessly. When the last Kato, the one with the L1 conversion, gets its chip it, too, will be speed matched.

I also did some diesels. The two Life-Like Burlington SD's have now been matched, as has one of the Bachmann Pennsy SD9's that I got from Micro Mark for Christmas. This is a great locomotive with sound and everything, and I really wish they had Burlington paint schemes like the Life-Likes, but unfortunately they do not (and the LL shells will not fit on the B-mann chassis without modification, so that's out, too). Tragically I found out that the second of the Bachmann SD9's wouldn't run in reverse. I cleaned wheels and checked gauge and the front truck fell right out of the chassis. When I put it back in place I found that the gears wouldn't mesh and the wheels would spin freely.

So back to Bachmann it goes. Of course I don't have the receipt, so I'll end up paying full repair price on a brand new locomotive. That's my life. I'll suck up the cost to get it fixed, though, because I do like it, and I love the sound. The N Scale Encyclopedia didn't think so highly of them, but perhaps since I got a later run I got better locomotives (at least one of them anyway). Time will tell.

I didn't get around to speed matching the J's or the GP7's, so that will have to happen at a later date.