Sunday, November 29, 2020

About Those Locos

A little more on the Mehano HO scale locomotives.

Mehano is a Slovenian toy company that makes railroad models (among other things). Their European offerings are considered to be high-end but the ones that they made for the American market, sold through International Hobby Corporation, were considered to be low end junk, sort of like Bachmann's N scale stuff through the 80's and 90's.


The lot I found was two 2-8-0 Consolidations and a single 2-8-2 Mikado, all lettered for the Chesapeake and Ohio Railroad. These three were reportedly sold through a Canadian grocery store chain called Loblaws as part of their President's Choice series. Most of those offerings were Canadian roads, but these are oddities (being Chesapeake and Ohio). Everything I have been able to find out about them suggests that they are 2006 vintage or so, which makes them higher quality than some of the earlier ones. They are pretty simply made, molded plastic shells on plastic frames with cast weights in the boilers.


The single 2-8-2 Mikado has a different tender than the Consolidations, sporting a "The George Washington" title above the C and O label. It was equipped with what is called a universal coupler on the tender, meaning it will connect with both horn-hook and knuckle couplers. The coupler on the front of the loco is a non-operational dummy. This tender was unique as well in that it did not have the two-pin plug or the two wire connector coming from the loco that the Consolidation tenders had. I am sure this would have improved the pickup characteristics, but the loco seemed to run OK without it. Power to the motor was supplied solely by wires connected to pickups on the drivers. Since the frame is plastic and the motor hard-wired it was very simple to wire for DCC. The back up light on the tender is operational, being wired to the tender truck pickups through a diode so that it only operated in reverse. This, too, greatly simplified the switch to DCC. More on that later.


The locomotive itself is a handsome enough unit although some of the details are not right. The bell, for instance, is somewhat large and should be hanging off the front of the smokebox although there is photographic evidence that some Mikes had them mounted in front of the stack as this one is. Doing my research online says that the details are cast on, but this one has grab irons and cut levers made of wire and separately applied. It is powered with a can motor of dubious quality that should be easy to swap out if necessary. I did have an issue when running the loco for its break-in run of the screw holding the drive rod coming off, but it was reinstalled with some LocTite and shouldn't be an issue again.


The Mikes are probably my favorite of the USRA pattern locomotives so I was pretty happy to be able to pick this one up as inexpensively as I did.


The two 2-8-0 Consolidations are identical in every respect. Like the Mikado the tenders had operational pickups and reverse lights, but unlike the Mike the tenders were also wired to a two-pin receptacle at the front of the tender. The loco had a two-wire connector that plugged into this receptacle and tied the power pickups for the tender to the locomotive. The wiring stuck out of the cab opening, so it was pretty obvious. I have no doubt this improved the power pick up characteristics of the loco, and it makes me wonder why the Mikado was not similarly equipped. The loco is equipped on each end with functioning horn hook couplers.


Like the Mikado the grab irons and cut levers were made of wire and separately applied. The motors are likewise isolated, being mounted in a plastic frame and wired to the pickups from the drivers. They, too, were very easy to convert to DCC.


All three of these locomotives were rewired with six wire harnesses from TCS so that they could be disconnected from their tenders. To do so I unsoldered and removed the original wiring and connected the TCS wiring in accordance with standard DCC wiring practices; red and black to right and left power pickups respectively, gray and orange to the negative and positive motor terminals, and blue and white to the headlight.


For the Consolidations I drilled a small hole behind the motor on the right side to thread the wiring harness through. This avoids running the harness through the cab opening. A small piece of heat shrink tubing disguises the wiring somewhat.


For the Mikado, since it did not have wiring from the loco to the tender, I hollowed a small relief at the rear of the loco frame to run the wires through and taped them down. When the loco shell is installed it goes over top of the wires and holds them in place without pinching them. I made two hollows, one on each side, but then opted to use only the right side since that is the side the tender connector opening is on (even though the connector was not installed the mount and hole was present for it).


The tenders were likewise wired with the receptacle side of the TCS harness. The existing connectors were removed from the Consolidation tenders and their mounts cut off from all three. The six wires were connected to their corresponding decoder wires and the black and red wires were connected to the appropriate truck connecting ring. The backup light was unsoldered from its diode, the diode was removed and the light wired in to the blue and yellow leads on the decoder. Holes were drilled in the coal load to allow sound to escape and the speaker and keep-alive capacitor glued into place.


I was only able to get two decoders at first (the third one is on its way now) so the receptacle side of the TCS harness was just connected to the tender pickups on the one that didn't get a decoder. Note the diode still connected to the reverse light in the image below. Since the tender wiring is detachable and the tenders are identical in all other respects this enabled me to run any of the locos on DC using the non-DCC equipped tender, at least until the last decoder comes in.


The installations went very well, but I have discovered the TCS connectors are very fragile, especially on the receptacle side. I have broken the black leads off of two of them so far, one while attempting to install it and the other while disconnecting the locomotive from the non-DCC tender. I have a different type of connector on the way and they will be installed along with the decoder on the non-DCC tender. The new connector type is a double stack of three pins instead of a six pin flat connector, I'm hoping I can mount the receptacles to the tender frames and that the different arrangement of pins will give a little more strength and support to the connectors themselves.

I'm also going to have to renumber one of the Consolidations, but that is a problem for another day.

Saturday, November 28, 2020

Holiday Display

 When last we spoke (?) I had found what appeared to be roughly HO sized holiday buildings and purchased a triplet of C&O steam locos with the insane idea of perhaps making a Christmas layout around the trees.


A quick trip back to the dollar store with my HO ruler verified that yes, the buildings in question were in fact roughly HO size (a bit large, but not overmuch) so a full set was purchased. Later on, at the Mart of Wal, I found some ceramic buildings that were about the same size. I went ahead and obtained a few of them as well.

While perusing my new MicroMark catalog I found some cheap-cheap Digitrax SDH166D sound decoders with the speakers and keep-alive caps installed on sale, so I decided to go DCC and ordered them. I also ordered a set of 6 pin micro-connectors with multi-colored wiring harness from TCS to wire them up with. The wires were red, orange, blue, white, gray and black; just the right colors for the power pickup, motor and headlight connections. 

The pin side of the harnesses were wired into the locos and the socket sides wired to two of the decoders (the third was back-ordered) and the tender of the last loco. The decoders were then wired into the trucks of the tender and the speaker and cap mounted in the tender shell. A set of holes in the coal load lets the sound through without being overly obvious.

The sound quality is about what you could expect from a cheap-cheap 8 bit decoder with limited sound library (less than 50 bucks, has one steam loco library and one diesel, a GP-38, library; I should have gone another 11 and get the SDXH166D which is a 16 bit decoder and more locomotive options but I didn't see them in time), but it is sound in a complete package and for a pretty good price so I'm OK with it. I'm using a Bachmann Dynamis for control and it works fine for the application.

Next I pulled out some old Life Like Power-Loc track (yes it's junk and Unitrack is better, but this is for a holiday display so I'm OK with that) and set up a couple of configurations. I settled on a 90 degree curve followed by a 9" straight for each section and drew up plans for the tables. Once built they were draped with some cheesy white felt cloth to simulate snow and the buildings placed on it. 


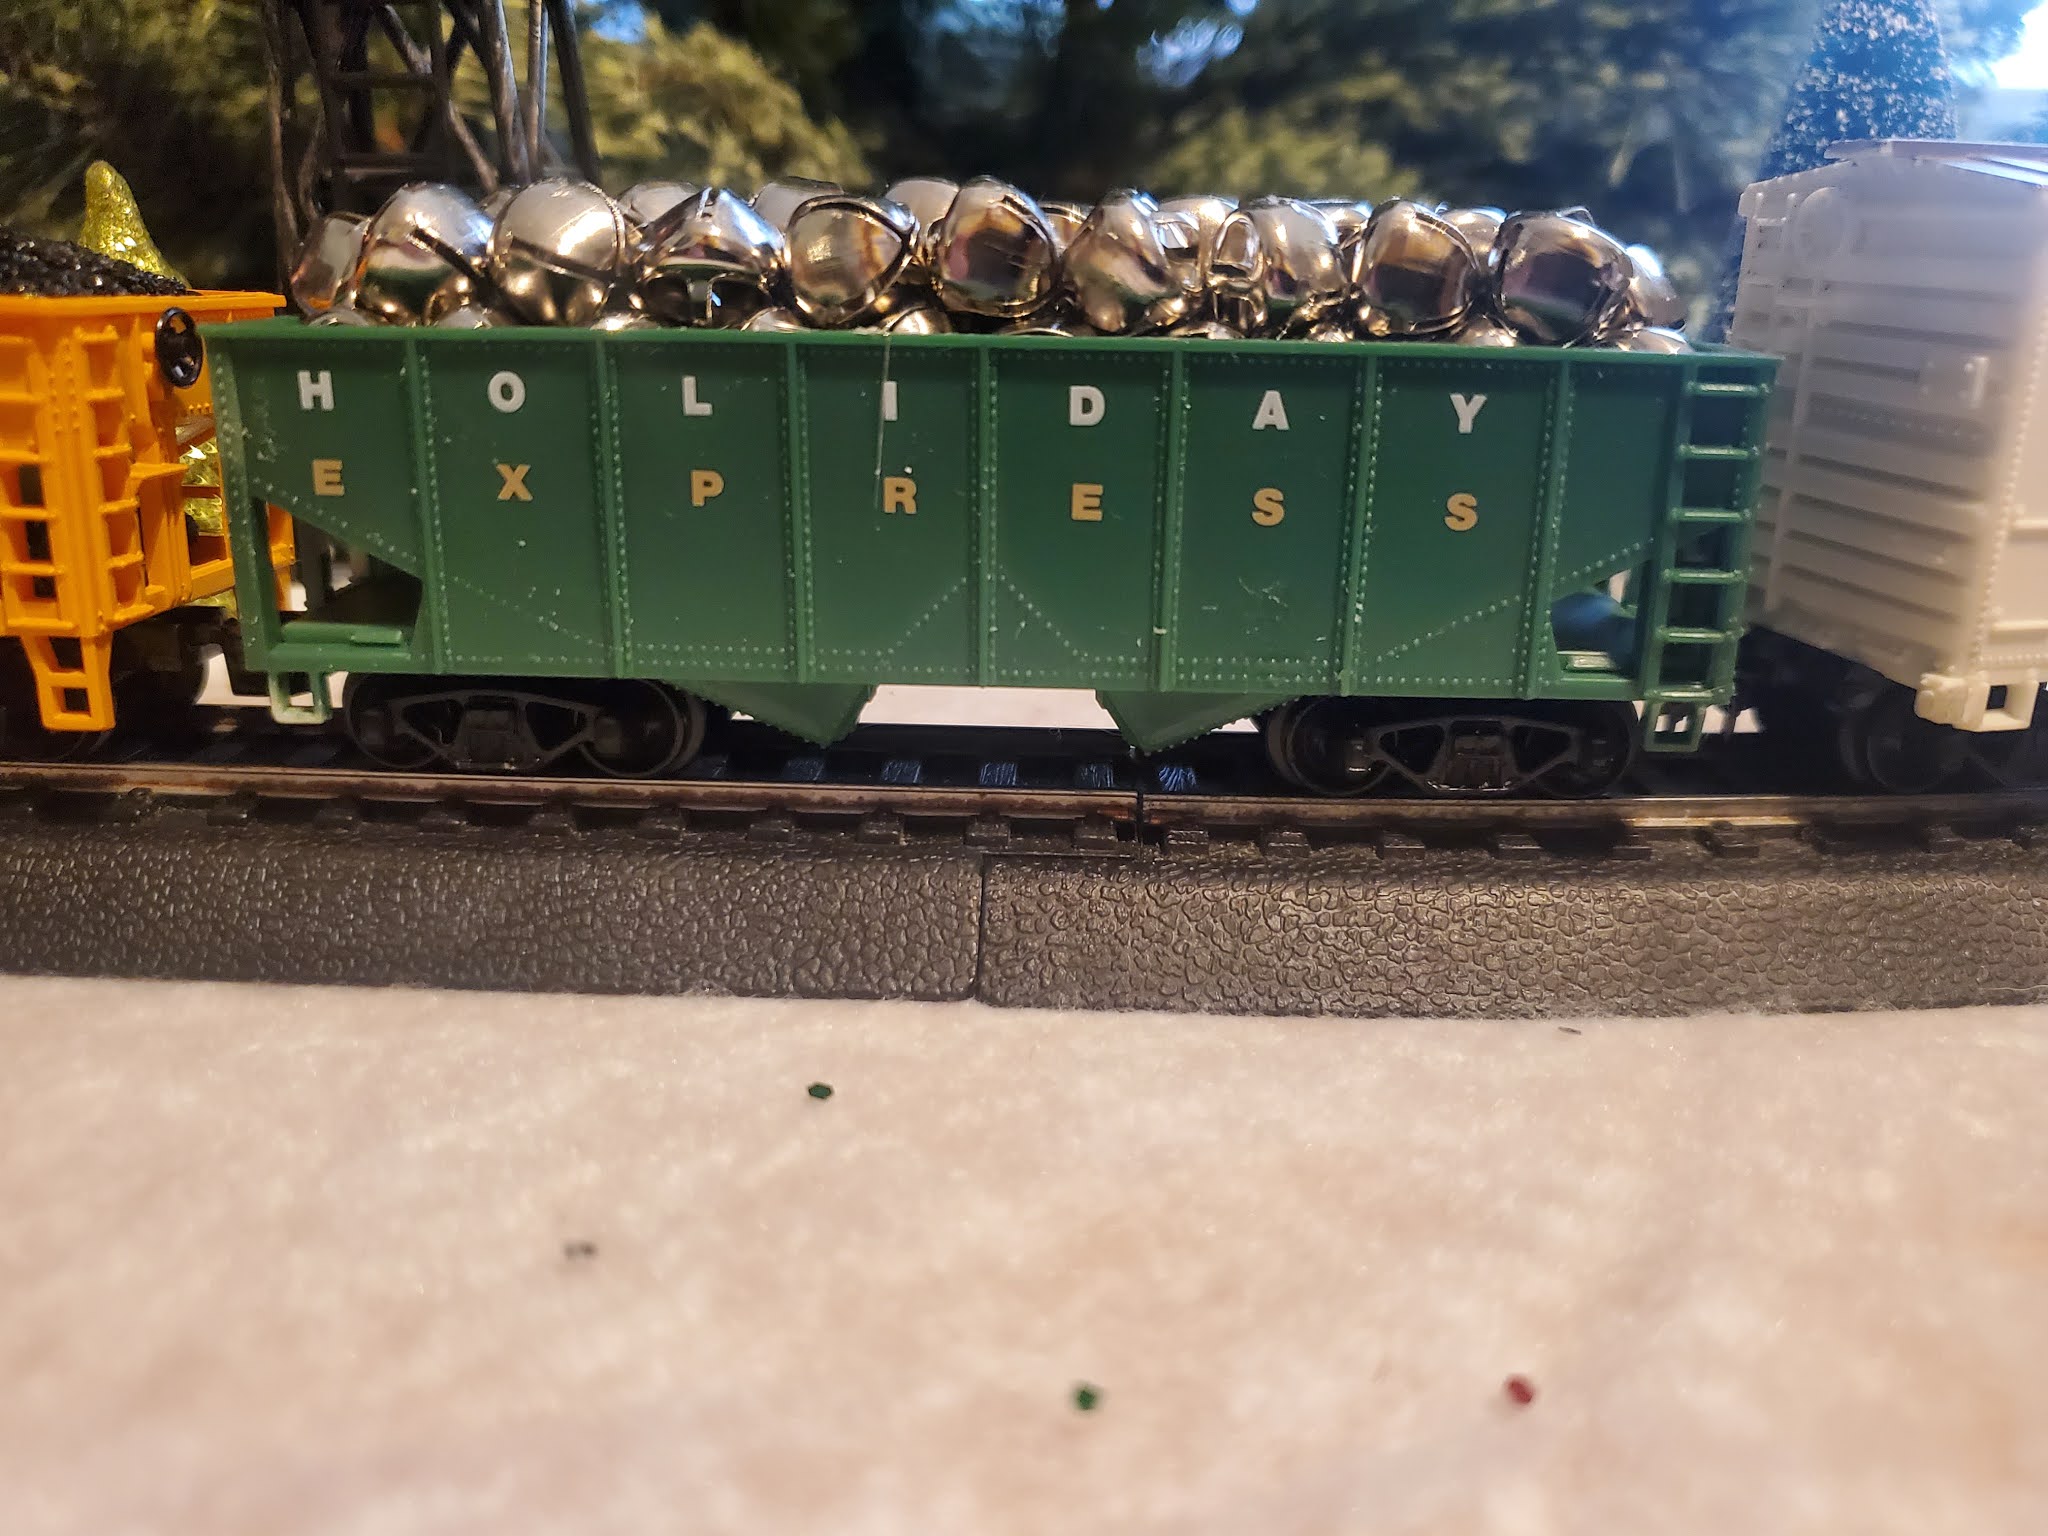
Last but not least, there must be Christmas cars. I picked up a set of three on Ebay - a boxcar that I put some wrapped packages in, a hopper that I filled with silver bells, and a caboose - and bought some cheap ones to repaint to fill out the consist. I made my own decals with the Testors decal sheets and an inkjet printer. I think they turned out pretty well.


 When the tree was set up it was surrounded by the newly built tables and all the pieces put on. With everything lit up it makes a festive holiday scene.

Merry Christmas to all, and to all a good night.


Tuesday, October 27, 2020

Rubber Scaling

 I was running some projects for Mrs Hades the other day and saw some Christmas display buildings at the dollar tree store. They look to be roughly HO scale, and I thought it might be nice to have some larger trains to go around the tree, complete with some of these buildings.

I have some HO from my wife's family, since I am "the train nut" I get everything railroad related that they come up with (such as a box of VHS tapes that are being donated to a local club). The motive power from that hand-me-down set was, and is, an ancient Mehano GP7 that has a distinct growl in the gears, but what I wanted was steam.

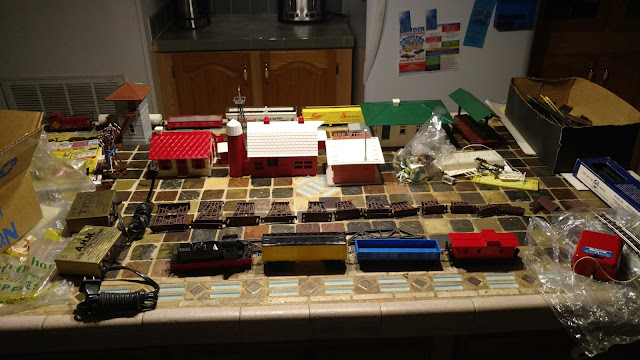
Hand me down trains from my wife's family, an ancient Mehano GP7 and its consist imported by AHM. The accompanying buildings all appear to be O scale.
Also this craptastic set with a rubber band drive switcher loco and huge flanges that won't run on normal track. Yeah, I get it all. The motor on this one runs but I haven't been able to find suitable rubber bands for the drive.

 So, off to the online auction site I went, where lo to my wondering eyes should appear but a set of three steam locos, two Consolidations and one Mikado. A bid was placed and the auction won, and when they arrived I quickly unpacked them.


 From what I've been able to find they are also Mehano locos, released sometime between 1992 and 2006 as part of train sets sold in a Canadian grocery store called Loblaws. They ran surprisingly well, especially after being lubricated and run in about 30 minutes in each direction.

Now I just have to buy some of those buildings and build a platform for them that can be taken apart and stored with the rest of the Christmas stuff.


Sunday, September 20, 2020

SITREP 9/20/20

 Yesterday we had another T-TRAK get-together of the model railroad club. The narrow gauge modules didn't go to this one since I haven't corrected all of the issues I had with them, but I did get some scenery done on the end cap.

 Let me digress.

I built an end cap to use when running my narrow gauge modules to complete the standard gauge loop. At the time that I built it I had no intention of ever using it for anything other than completing that loop for home use while testing the narrow gauge line. However, we have a show coming up in October at the Selma NC train station, and we were short a loop. The club asked me if they could use my end cap, and I committed to completing some scenery on it so that it could be used for that purpose. 

In other news, my grand-daughter in Wyoming has gotten into horses and rodeo riding, and it just so happened that I have in my collection of figures a horse that looked amazingly similar to hers. A little paint and it is a match. Additionally, I have a structure of a horse barn that I built long ago for my 4x8 layout that was going to waste. And so, I reasoned, what better than a horse pasture for the end cap.

The first thing I did was lay out all of the components. Well, actually, the first thing I did was build the windmill that you see, and then I laid out all of the components. Horses, of course, and the horse barn, but also some large sunflowers that I had bought because my wife likes sunflowers and never found a place for.

I rearranged the pieces until I had a rough idea of where I wanted everything to go, and then started gluing everything in place.

The final arrangement moved around quite a bit, but eventually I had everything where it needed to be. The rocks were better on the outside edge, a water tank to go with the windmill, a tree for shade and of course the shelter.

The rancher and his helper checks fences. Yes, the fence is a bit big, about 10 scale feet in fact, which is bigger than I wanted it to be but that was a detail I didn't really notice until the figures were glued in place. That's what I get for not checking the measurements.

The sunflowers are 12-14 feet in height because they are HO scale, but there are sunflowers that are that big so it's not a huge stretch. I was careful to plant them all looking the same way and the wife loves the way they came out.

The white horse is the grand-daughters. I got a real good view of the grass in front of it, but not so much of the horse itself. A shame really, but at least you can see what it is.

A few more horses stand around the shelter observing the rancher from afar.

And the overall birds-eye view.

Yesterday it went to the show (but was not included in the layout) to be inspected and certified as ready for use. After the show I took it home, added some track feeders and painted the edges in the appropriate club color of brown. Next is to build a shipping container of some sort to protect it as it makes its way to the show in Selma.

And in other news, J class 611 has arrived and has been programmed. I also put decoders in my 4-8-2 light mountain locomotive and I plan on making a K2a out of it, just one of many projects. My two Consolidations also got decoders but one of them has a hitch in its giddyup so it will need some additional work on the driveline. 

I also have decoders for a couple of diesels, but I need a few more for some Life Like GP20's in N&W livery. These are some wonderful locomotives, I got a couple of them in garish MicroTrains Christmas paint and was pleasantly surprised at how well they ran. I have since acquired three black ones in N&W paint and one in the CB&Q Redbird scheme. I don't think they made a black CB&Q loco, but if they did I would certainly retire the SD7 and SD9 because their wheelbases are a bit long for some of my current corners.
The CB&Q GP20 ran on the club layout yesterday, turning in a flawless performance where the GP9 bounced over a piece of expansion track (later on I found one wheelset on the narrow side) and both it and the Consolidation picked points on one turnout in particular. Like I said, they run surprisingly well for being inexpensive locomotives, a little bit on the noisy side but that's something I can live with.

And that's the state of things here. I hope you all are getting some train time in.


Wednesday, September 16, 2020

More Power

Earlier in the year I had sent my Bachmann J class 611 in to have a drive rod/valve gear issue repaired, and they didn't have parts so they sent it back to me. Bachmann has just re-released the J class and I had one, road number 608, on pre-order. I got the call last month saying they were in, so I went ahead and ordered another one, road number 602, while I was at it.

When they arrived I disassembled one of them and compared them to the previous run 611. I found the locomotive itself is little changed. There is a hole in the previous run above the trailing truck that had no apparent purpose that is not present on the current run, the grille in front of the cab on the previous run is an actual hole in the body of the locomotive covered by a screen and on the current run it is a solid casting, and the red color on the side stripe of the new run is a brighter red, not maroon like the previous run. Other than that, the only real difference is the wiring. The wiring in the loco itself is the same, but instead of terminating in a plug it terminates on another PC board which is then wired to the new style plug for the sound equipped tender. The tender is quite a bit different because of the sound board installed, but visually identical save the red stripe color.

 A comparison of the parts sheet between the previous and current run shows that most of the locomotive parts are the same, with the exception of the wiring. The boiler shells are interchangeable with the only differences being cosmetic, as listed above. With that information in hand I went to the website and saw they had some parts for the J class again. Since the part numbers looked to be the same as the previous run I ordered a cylinder assembly to repair 611. When it arrived I unpackaged it to install it, but unfortunately, for some unknown reason, it didn't have the drive rods installed (which was really the part I needed).

So instead I sent 611 back to Bachmann to be repaired. I got the call today telling me that, once again, they didn't have the parts but since they had a current run, and since I had added a sound decoder to my loco, they were glad to replace it for a $60 fee. I mentioned the different colors in the stripe but gladly paid the upcharge, so I will once again have J class 611 on my roster. That will make 4 J class locos, and I have enough passenger equipment for two trains. We'll see where it goes from there.

I also ordered cylinders for my 0-6-0 locos to replace broken ones. I was unable to get a green set for my Southern loco, so I got black sets for both. I also got the lead and trailing trucks to convert the Southern 0-6-0 to a 2-6-2. During the repair process I found cracked gears on my Pennsy 0-6-0. Not to worry, on a previous order I had gotten a set of drive wheels for it, so they were quickly replaced. I also modified the mounting of the trailing truck a bit since the spacing between the rear driver and trailing truck just didn't look right to me. Now I once again have a good running 0-6-0 Pennsy switcher and as a bonus I have a good running 2-6-2 Southern Prairie as well.

I've also adjusted the volumes on all my sound equipped locos, they were too loud for my train room. The J class locos will all have their own whistles as well, with the N&W 3 chime flat top staying on 611.

In other news, I have been applying scenery to my T-TRAK end cap so that it can go to a show in Selma NC during the first weekend of October. I won't be able to attend the show since it's my anniversary weekend, but hopefully the end cap will be well received. My task for the upcoming month is to build a case for it so that it won't be damaged during transport.

This upcoming weekend will be another "show" at the same member's house as last time. I won't have the narrow gauge there since I haven't finished the scenery or fixed the issues I found with it at the last show, but it will be good to see everyone again.

One of these days I will begin construction on my new work room, and then perhaps I'll have layout news to share.

Monday, August 3, 2020

Working On The Railroad

Last February the East Broad Top Railroad was sold to a non-profit with plans to restart operations that had been suspended since 2011. This non-profit, the East Broad Top Foundation, Inc, is closely aligned with the Friends of the East Broad Top. The railroad survives today in large part due to the restoration efforts of the FEBT, although their relationship has not always been close. With the formation of the East Broad Top Foundation the FEBT is now an integral part of the future of the railroad.

The FEBT has been doing restoration work at the historic shops complex for many years. I was a part of the crew that was involved in the work done on the car shop many years ago, but it had been a while since my last trip. But when the news came out that the railroad once more had a chance of survival I had to be a part of it. So, on June 11th and 12th I made my first trip back up to Rockhill since the early 2000's to join in the volunteer restoration work .


This is my second foray in as many months to the EBT. Last month I worked with the window crew cutting and installing glass into restored window sashes. At least one of those sashes, for the freight house, was old enough that it was not assembled with nails. The pieces had been fitted and formed to be assembled with wooden pegs instead. All of the window sashes had to be carefully repaired before new glass could be installed, with some of them being completely rebuilt.


The sashes were then primed to prepare them for paint and the outsides of the windows were painted, and that is where we left them at the end of the work session.

This past week was supposed to be the family beach week in Myrtle Beach, but due to covid and the acquisition of a new puppy we opted not to go this year. I did take the week off, but we worked on the house instead of going somewhere for vacation. But then I got a special treat. Sunday, August 2 was my birthday, and for a present my lovely wife paid for the hotel so I could go back to Rockhill for the August 1 and 2 work session.


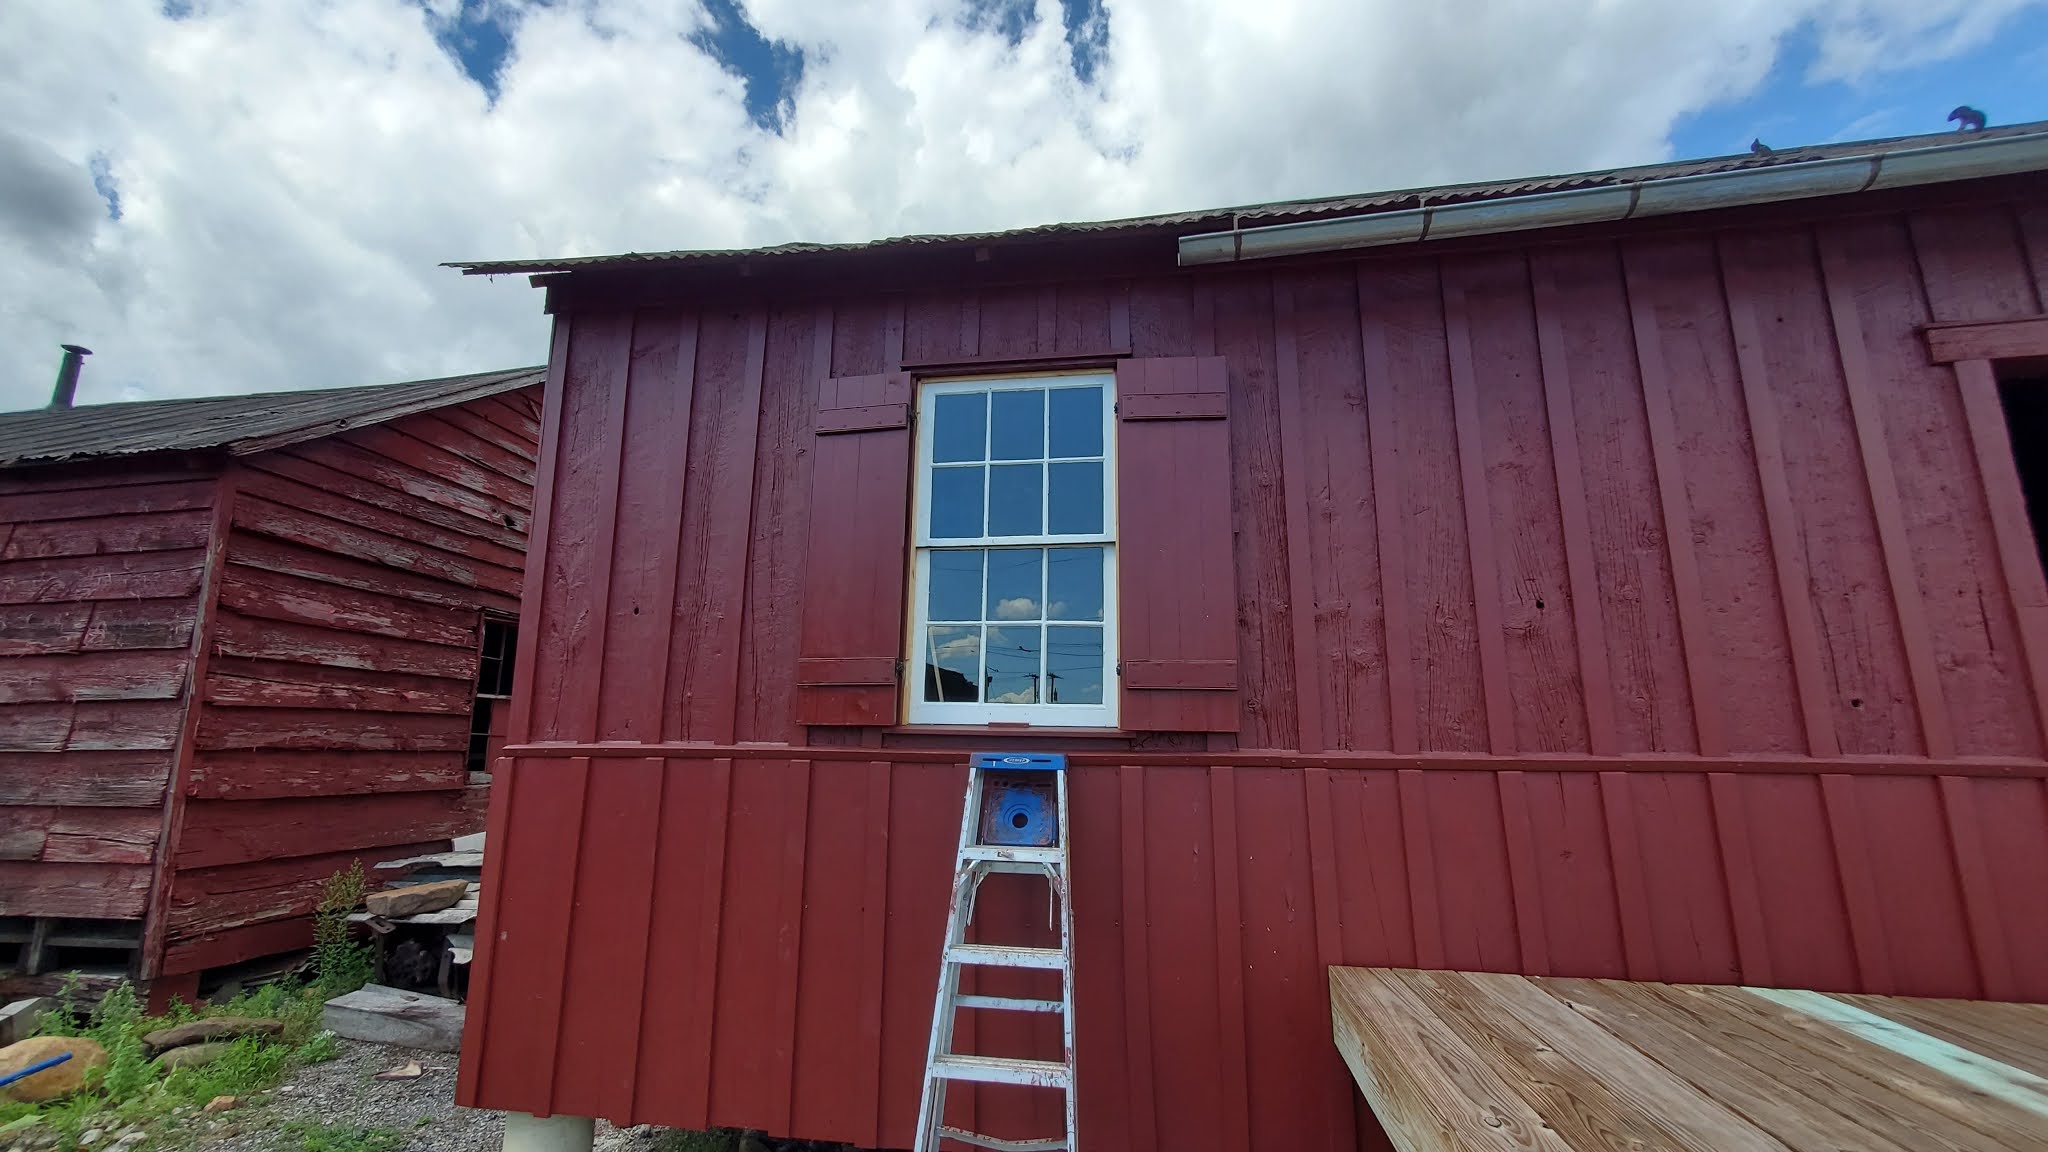
This session we installed three of those restored sashes into the Freight Office. This is one of the final phases of the restoration on that structure. The windows had been covered with plywood blanks to keep the majority of the weather out. On Saturday the blanks were removed and the newly restored windows test-fitted.


Once they had been shimmed and adjusted to fit their respective holes they were painted. On Sunday we took the freshly painted windows over and installed them into the two corner windows, but the shutter covered windows needed a bit more work.


The shutters covered a blank frame that had been built to fill a hole in the wall. The original frame had rotted away so badly that it would barely hold the shutters, but during previous restoration work that had been corrected. Properly sized sashes were rebuilt for this purpose, but before we were able to install them sliders had to be built to hold them.


First outer frames had to be built and installed, which wouldn't have been such a difficult thing except that they had to be notched to clear the shutters.


Once that was done slider pieces had to be built to retain the sashes in the frame. The sashes were then test fitted and shimmed. With that complete they were painted in preparation for installation.


The sliders were installed, then the entire window frame was painted. Since the paint was still wet at the close of business Sunday the sashes could not be permanently installed, but everything is ready to be finished up in two weeks when the railroad officially re-opens for business.


Unfortunately I will miss that event, but I am excited at the prospect of the steam engines running again next year. I will certainly be present when that happens.

Tuesday, July 28, 2020

Expansion

Since we last spoke I have had a couple of railroad related events.

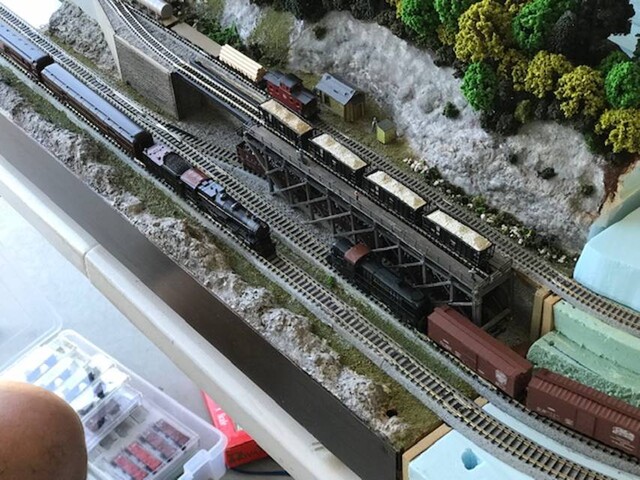
First the North Raleigh Model Railroad Club had a small get-together at one of our member's houses where we set up T-TRAK modules and ran them a bit. My narrow gauge modules got a bit of exposure, and the reaction was overall positive. I have the two straight modules (Dragon Bridge and Coal Dock) done, and I found some issues on the corners to repair. Now I have to get the corner modules finished.


Another club member and myself took a trip up to northern Virginia to get with one of the North Virginia N-Trak club members to look at their Nn3 oNeTrak modules. We are planning on making some modules of our own, and the intention is to ensure they will mate up to the NVNTRAK modules if we ever make it to the same show.


Plans are also still underway to expand the train room into Youngest Boy's newly vacated bedroom. I am planning on pulling the closet wall down and turning it into the work room. There will be a staging yard there with tracks going through the old closet door into the train room, which will be cleared of anything not layout, and the layout will be revamped and expanded.

But first, next weekend I'll be taking a trip to the East Broad Top Railroad to do some restoration work. I went up last month and drove the Jeep, but this time around I'll take something that isn't as savage on the interstate. The Subaru just got a new engine, so it should be a good trip for it.