
This is the Bachmann 4-4-0 in N scale, in the old Jupiter paint. Note the large drive shaft between the loco and tender. The newer versions of this model have a thinner driveshaft and the paint is in blue and red to more accurately depict the Jupiter as she is now believed to have looked on the day of the golden spike ceremony at Promontory Point, Utah.
The Bachmann 4-4-0 comes in several paint schemes and in a couple of different configurations; straight stack and balloon stack. Older versions of the loco can sometimes be found for a fairly cheap price at train shows, but I have seen them go for ridiculously high amounts on that well-known auction site. If you can find one that runs decently for cheap it is an inexpensive way to get into Nn3, but be warned...it's a gateway locomotive. Before you know it you will be ordering kits from Republic Locomotive Works, then you will be getting Marklin Z scale mechanisms for your conversions, and then it's all downhill from there. But I digress.
The first step is to disassemble the locomotive. First remove the tender coupling screw:

Set the tender aside. Remove the bottom plate screw on the locomotive:

Next, remove the bottom plate and swing the drivers out of the way. The worm gear can be pushed out of the back of the locomotive.
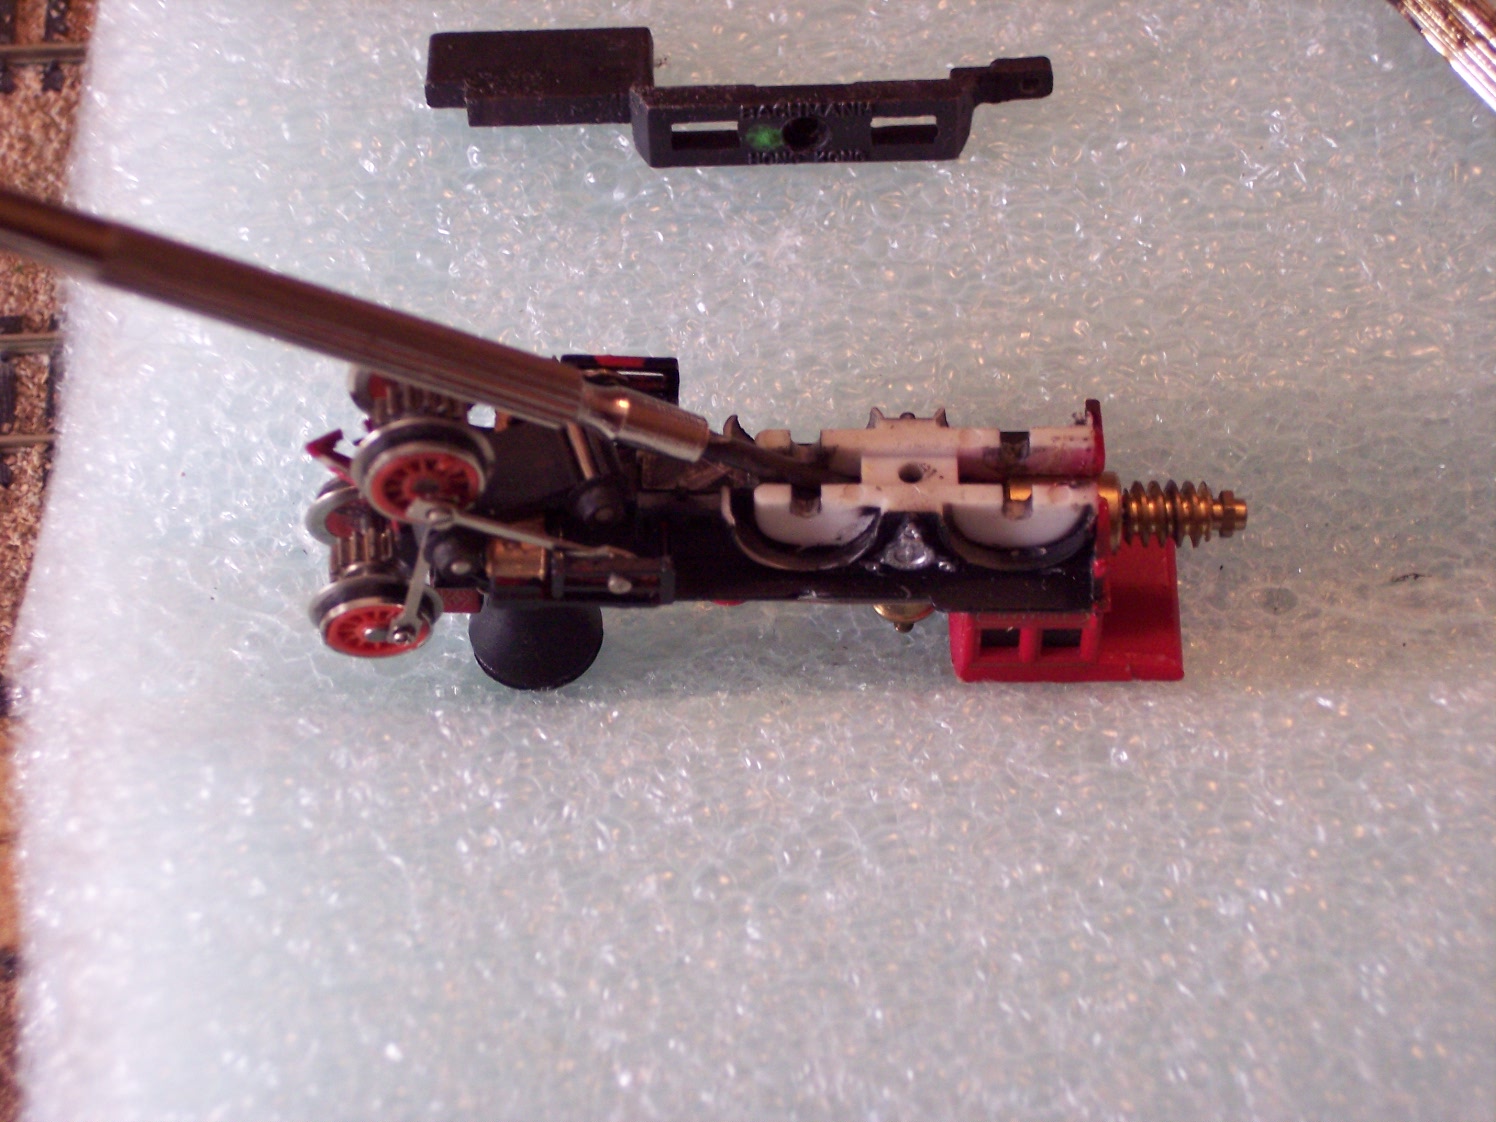
Now pry the supports out of the valve gear hangers:

The steam chests will slide off of their tabs on the locomotive body.

Put the locomotive body, worm gear and bottom plate into your parts box. You will deal with them later. For now we will continue the disassembly of the running gear.

Remove all four screws from the drivers and remove the side rods. Be careful not to lose any of these screws! Put them and the side rods into your parts box.

Now remove the pony truck from the valve gear. You might find it easiest to cut one of the connecting bars to do this.
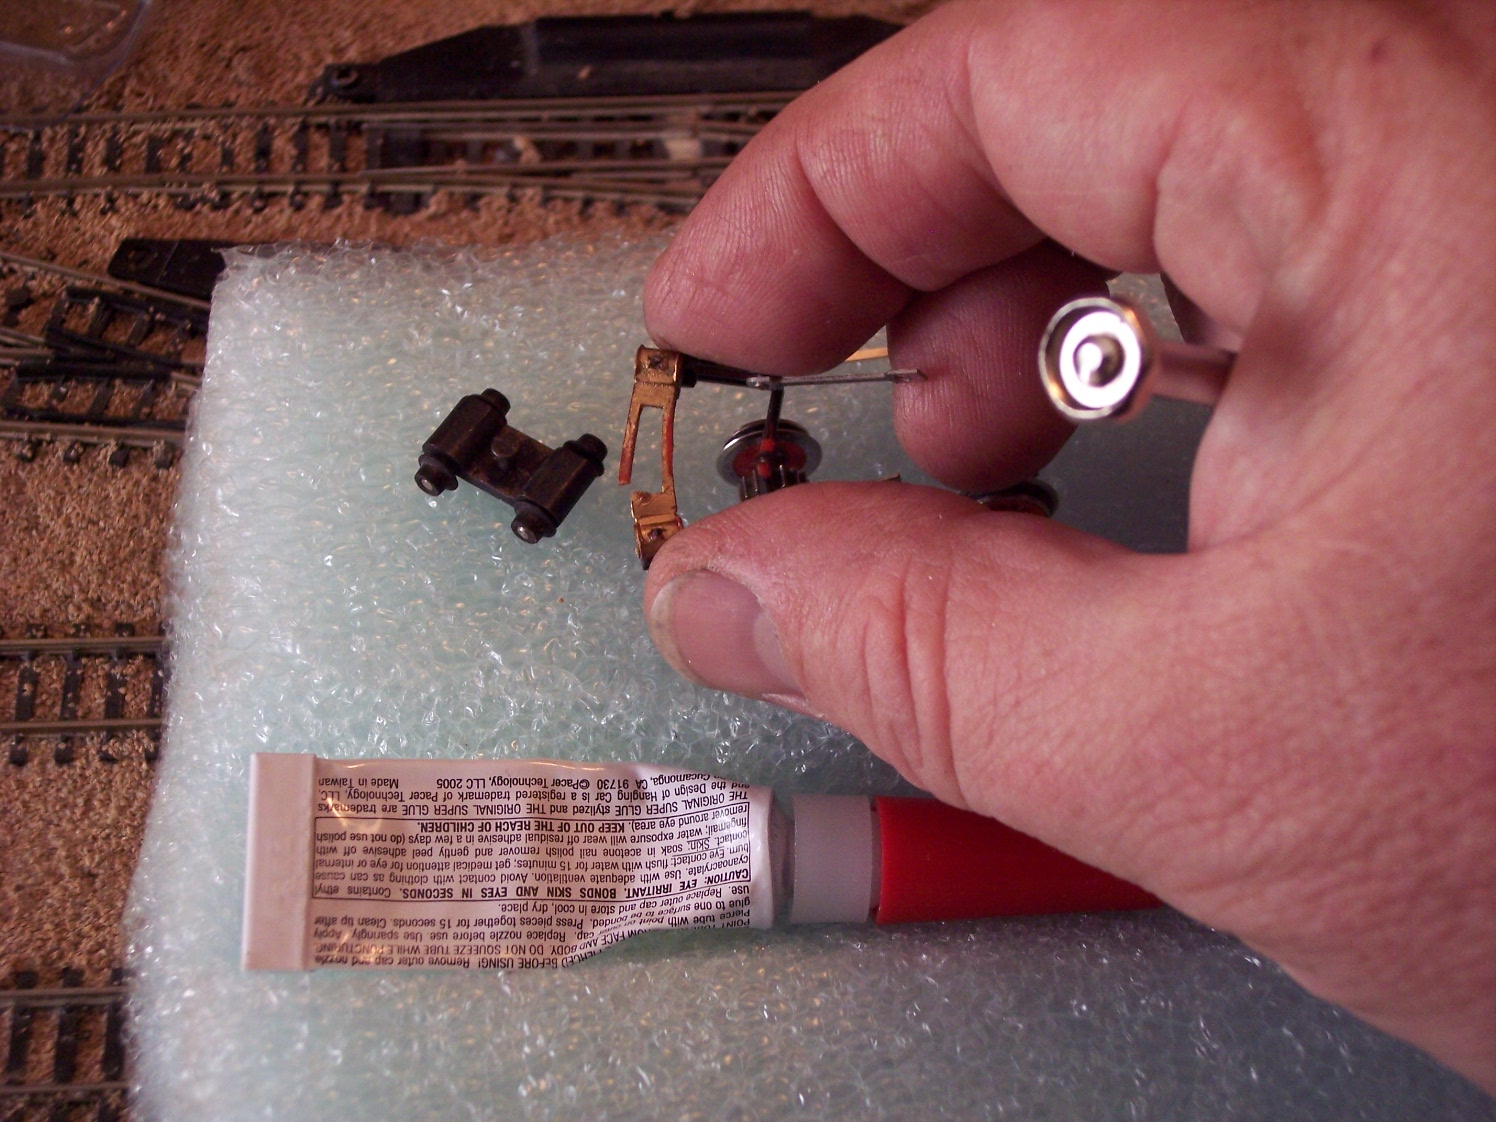
Now pry one of the wheels off of each axle and remove the axle from the pony truck frame.

This completes the disassembly of the running gear. Put everything into your parts box, we will disassemble the tender next.

Remove the tender truck screws and lift the trucks off of the tender. Mind the truck springs, there are two of them for each truck and they will get lost very easily.

Next remove the coupler from the coupler pocket. You will be fitting a Z scale coupler when you are all done, so these parts will not be used again.

Note the coupler spring...looks a lot like a truck spring, doesn't it? It can be used as one in a pinch.

The tender body does not have to be disassembled any further than this, it contains the motor and that is about it. If you want to take it apart to paint it be sure to mark the motor so that it goes back in the same way, if it goes in upside down the locomotive will run backwards. I'm going to take this one apart so that the tender can be stripped, but not today. Put everything in your parts box, we're done for today.
The locomotive body can be stripped for painting as is, the only thing left to do if you must is remove the weight from the cab. It is glued in place, work a #11 Xacto blade in and around it to break the glue bond and it will slide right out. We won't be covering that, I'm sure you can figure it out on your own.
In the next installment we will disassemble the tender so that it can be stripped for painting. In the third installment we will be narrowing the locomotive drivers and bottom plate and cutting into the locomotive body to fit them. After that we will narrow the pony truck, put everything back together, and then the locomotive will be done. In the fourth installment we will reassemble the tender body, narrow the tender trucks and install the Z scale coupler, and then we will join the tender and locomotive back together and we will be done.
Or, at least, that's the way I have it planned out.
It should be fun!

No comments:
Post a Comment